More Pages

Showing posts with label Entry Floor. Show all posts

Saturday, September 6, 2014

Resin Casting Triumph!
[Or the Culmination of A Hard Won Battle!]


Welcome back folks!  I have such exciting news!  You will soon see the last of my resin casting trials...the battle is finally won!

I feel like I have climbed Mt. Everest...OK..maybe not quite that way...I'm not melting all over the floor due to my great exertion...but it feels GOOD to finally make this work!


Here is the product of my many travails.


 I know..it doesn't look too much different than before from this angle....


But here is an angle that can help you appreciate the change!


I love the highlights created by the resin over the Steampunk gizmos.  The polished shine of the floor is exactly what I had hoped for when I began this "little" project.

I wish you could all see this in real life...It is much more dramatic than in these pictures!  The shine is mesmerizing, the whole piece sort of glows due to the deep color in the floor, and the depth created by the resin is so incredibly dramatic.

(I showed my wife, and she told me she wanted to hang it on the wall!   My response was somewhat disappointing to her.)    :0)


I do have a bit of adjusting to do, because my floor ended up being a bit thicker than I intended.  It is a full 1/2 inch thick...Good thing I have some room to maneuver in my 12 inch high Entry.  

I am going to have to build up the floor for both the kitchen and the grand parlor as well, in order to level the ground floor.  I may also have an issue with my stairway...I hope I don't have to take it apart to adjust...shiver.   I planned for 1/4 inch..but my Steampunk gizmos didn't cooperate!

I will make any adjustments happily if I must however... because I am so excited about the outcome of my little resin casting drama!


And now, for the long awaited "After" photos....


That's all for now!  I just wanted to share my excitement at getting this to work!  And in spite of my many complaints...I think I would do this again someday!

On to the next challenge!

Enjoy your day!

Doug S


Sunday, August 24, 2014

Resin Casting Update
The Death and Resurrection of a Vision

Hi all!


You can tell from the title of this post that I have some bad news!  My resin casting test of the dollhouse Entry Floor was a total failure!


Photo Courtesy of Public Domain Pictures.net

The Resin was still sticky after 96 hours....it LOOKED gorgeous, but was totally unusable! There was a sticky residue on the top that made the surface entirely unusable for the application I wanted...i.e. Entry Floor!


But not to worry...

If at first you don't succeed, try, try again!

After I finally realized that The Resin on my resin casting test was just not going to cure properly, I called around to various stores that I thought might have folks who knew what they were doing with casting resins.  I knew I had followed the directions to the "T"...so why was my resin casting failing? 

I learned a thing or two I want to pass on to the next bloke who tries this for the first time!  So I am going to present you with the list of things to think about when doing a resin casting in order to get The Resin to set properly.

  1. First you must get Part A and Part B into the right proportions.  This I did...and did exactly right the first time...I know this was not my problem, at least at the beginning.  Depending upon The Resin type you are using, the proportions will vary, but for all of them, the ratio is critical.  I used 'Amazing Clear Cast',, which is an Epoxy Resin by Alumilite Corporation.  This epoxy resin required a 1:1 ratio.   No mystery there!
  2. Any non Silicon molds WILL require a mold release agent.  I have already revealed that I forgot this step, so I knew that I would probably not be able to remove the mold from The Resin...but that was OK..this was a test!  Right? 
  3. Don't use Transparent Resin Dye in Larger Castings!  I used Transparent Resin Dye in my last couple of pours, and come to find out, The Resin dyes can cause problems in larger pours.  One of the men I talked to says he will not use resin dye with clear resins, because it tends to create curing problems.  Now obviously, it must work in smaller resin castings, because I see many examples on the Internet..more to learn there!
  4. Watch out for old or separated resin parts.  I learned that resins can separate over time...and that it is important to shake each bottle and ensure that The Resin is fully mixed in each bottle prior to mixing the two parts.  It is also possible to get OLD resin directly from the store...since resins are scary to folks, the turnaround time on store shelves can be slow...So, testing is a GOOD idea all the time!  Not just for us newbies!
  5. Mixing Cups must be CLEAN.  As in...no resin residue left for EACH pour.  I didn't clean out the resin cups extremely well after each pour...you may remember that I did multiple pours...reasoning...will cure better...WRONG answer!  Multiple pours might  have been fine...but since I didn't clean up each pour well, it may have built up, causing me to have the wrong ratios in later pours.   A word to the wise... Resin is INCREDIBLY difficult to clean up!  Have lots of clean mixing cups available so you don't have to worry about it, and you can throw away the mess!
  6. Mixing time...don't skimp on mixing.  I think THIS is where I went wrong. The directions don't tell you this, but it is important to mix Part A and Part B of the resins for approximately 5 minutes! After one or two minutes, The Resin parts appear to have reacted to one another, The Resin clears, and you might (I did) think that The Resin is ready to pour.  NOT SO.   Mix for a full 5 minutes or so before pouring... The Resin is still in the process of reacting.
  7. Ensure that the Mold Release Agent is applied and dry! This takes a while, so start well before you want to pour.  Nothing tough about that!  But if it is not dry, it may cause issues with the pour. 
So....


Armed with my new information, I tried again!  This time with a smaller pour...that resin is SO expensive!  I repeated the use of cardboard, as one of the things I heard from one of the folks I talked to was that cardboard can retain moisture, and cause issues..but I didn't think that was a factor in my earlier pour, since there was no white cloudiness in the pour...and moisture causes that sort of issues. 

I used an old milk carton as my new mold...


I used two coats of the Castin' Craft Mold Release I had bought from Hobby Lobby...(before the last pour...I totally spaced on it the first time!).   In doing this again, I would actually use a third coat or perhaps some Vaseline, which is also supposed to be a good release agent. 

I mixed The Resin again, after having shaken the bottles for a good 5 minutes...and letting them set for nearly three hours to allow bubbles to escape.   I poured The Resin into the new milk box mold in one pour.  My final pour will be less than the 3/8 inch recommendation by the manufacturer, so I thought I would see how the single pour compared with the multiple pours.  


  At that point, I walked away and did not even look at the new pour until the next day.  Too much suspense is not a good thing! 


To my great joy and surprise...The Resin set very well within 12 hours!  Yeah!  I can do this thing after all! 

The Resin Has Been Conquered!

Now that I know what to avoid, and what things I need to look out for along the way, I am ready to pour my new entry floor!  I am excited to finish this project! 

I'll keep you posted on additional progress!  Until then...

Doug S


Sunday, August 17, 2014

The Very Definition of RESIN


Man what a sticky job!  I LOVE how the mock up of the floor is turning out...but wow.  

Teddy Bears Picnic
Photo courtesy of leww_pics via Flickr
I feel like a bear at a honey convention!

I have decided my project fully fits both of the definitions of "resin".

Definitions please? 

1. a yellow or brown sticky substance that comes from some trees and that is used to make various products
2. an artificial substance that is similar to natural resins and that is used to make plastics


The FIRST definition is my experience with resin.  

The second is what I am working with! 

But NOW boys and girls, 

it is time to report on the progress of my resin floor cast!  

Immediately after pouring the last coat.
Lessons Learned...make sure there are no HOLES in the sides of your mold!

Continuing from the point of having done the first pour of resin into the mock up mold I made from plywood and Foam Core, I've ended up making a total of four shallow pours to get to the point that I am right now....I am waiting for the entire thing to dry at this point...

I have decided to quit pouring on the mock up now, as I am fairly confident I can make this work, and that I know what my "sticky" points will be...which was the point of this first pour.  The resin is quite expensive...so I don't want to continue to "pour money down the drain"! 


Adding the Transparent Resin Dye
I used approximately 5 drops in the final layer

The major difference between what I had done on the first pour, and what I did on subsequent pours, is that I began to play with the transparent dyes...adding a bit of color at first, and adding more in subsequent pours.  

Determining how much color to add was the major reason I did the mockup...I did not know how the color would work with the resin, whether or not it would obscure the items beneath, or if it would be fully transparent.  


Mock Up Resin Floor after about 10 hours...color is holding up well.

Happily, the resin remains very transparent, and the mock up approaches what I had hoped for in the final version. 

I waited approximately 2 hours between pours...so this process has been a slow (and yes...sticky!) one.  After a couple of hours the resin dries to a somewhat jello-like state, at which point it is ready for the next pour.   The package recommends that no deeper than 1/4 in. pours be laid at a time, to ensure "faster" drying... 

[Its been about 10 hours so far...!  The resin is sticky, but not fully dried 
yet.!  Don't tell anyone, but that is not fast!!!]   

Well, I'll leave you with that for the moment...I'll continue to wait for this to dry...and I'll have to buy MORE resin....sigh.  BUT...I love how this mock up is turning out, and am encouraged about the outcome of the final floor.  

Have a great day!

Doug S

Saturday, August 16, 2014

First Pour pour Floor {Bad Pun, yes]

Greetings!

I hope you are all doing well!

Today begins the great experiment!  I am pouring my first clear resin floor..in mock up form...to make sure I can actually pull this thing off and have it look the way I intended...so far, so good!


I've taken the original "rejected" cardboard floor and cut it to size in my mock up version of the floor.  I wanted to duplicate the final pour with all the elements it will eventually have in it...so I started by adding the cardboard...I want to find out if I am going to have problems with warping or other malformation as a result of the resin.


I then added just a few of the elements of the final floor, again, just testing to ensure I don't have any unexpected reactions based upon material types, etc.   Since I am not going to use this floor, I made no attempt to arrange it other than distributing it evenly, and ensuring I had a couple of areas that had stacked items, to see what might happen in regard to trapping air. 


I used Amazing Clear Cast Resin....since I had such good results with my earlier attempts using this brand.  However, the Clear Cast Resins will not dry near as quickly.  It has nearly a thirty minute "work time" and will take many hours to fully dry...between 12 and 48 hours according to instructions. 


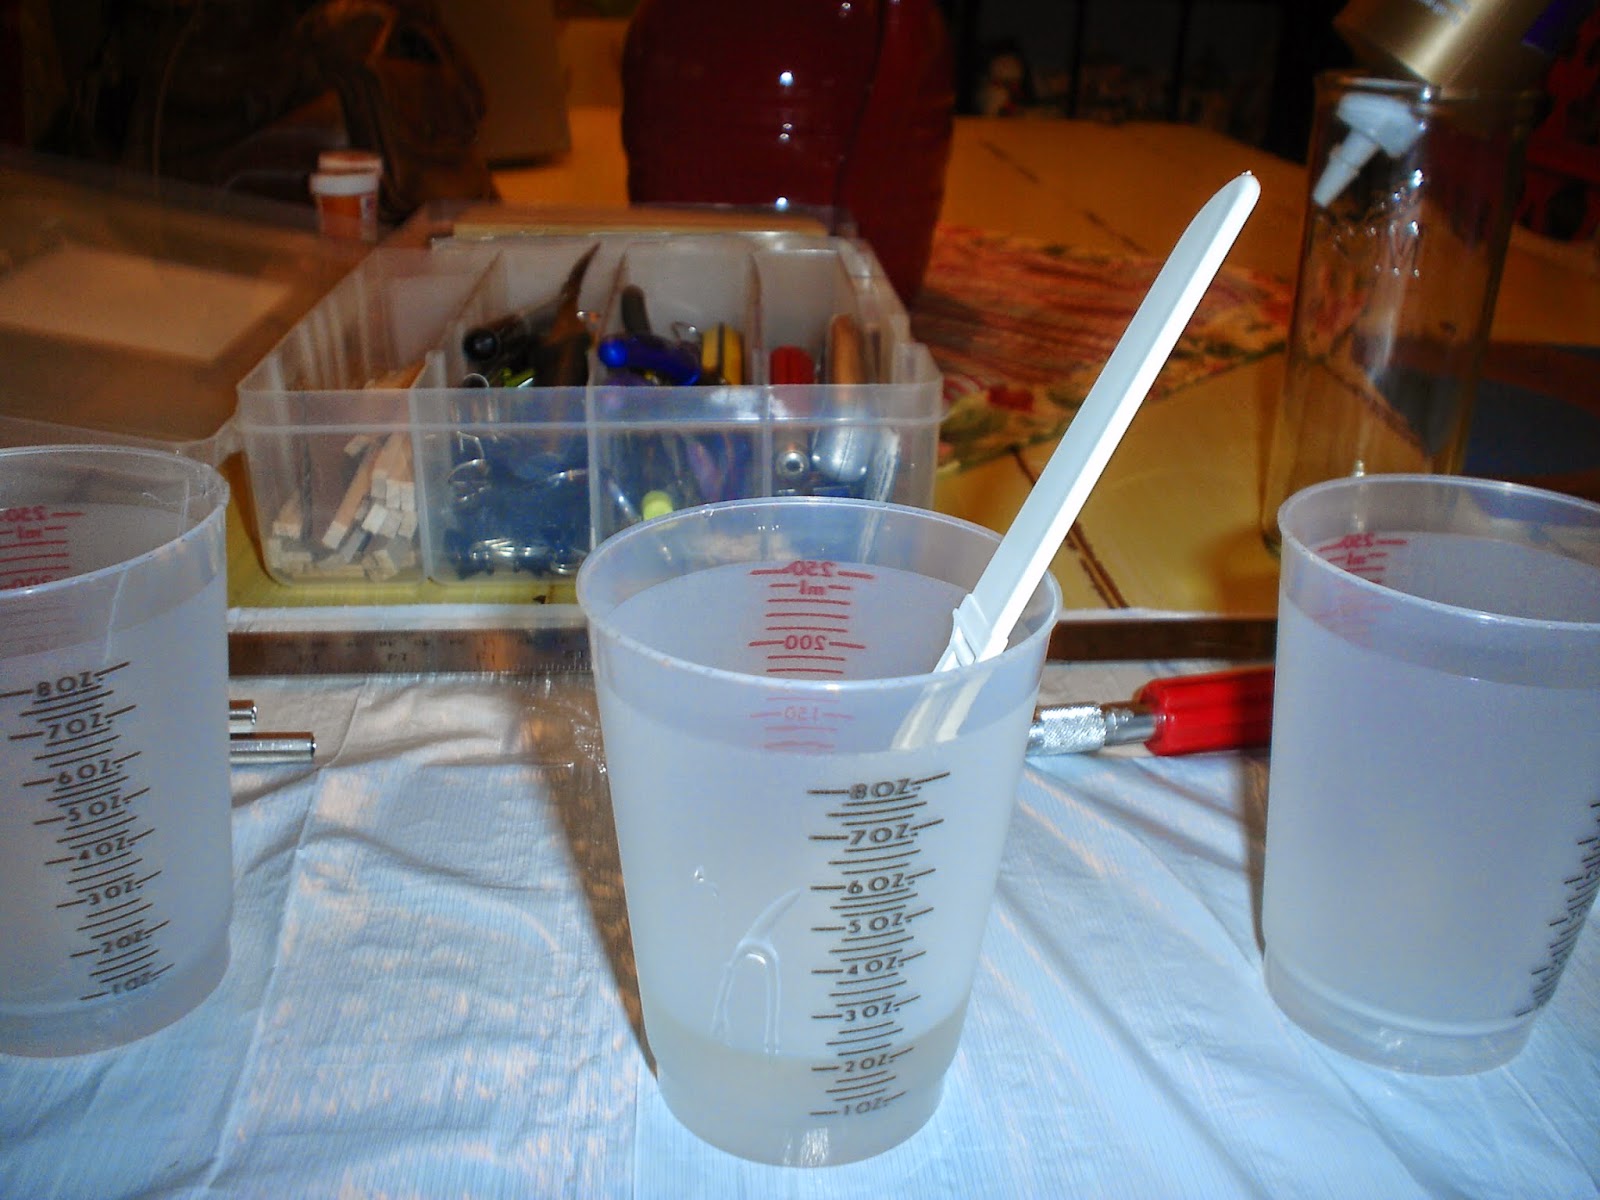
The first step is to pour equal amounts of Part A which is the resin, and Part B, which is the catalyst into two equally measured cups.  I measured 1 ounce in each for a total of two ounces when poured together, as I wanted to have multiple pours, to create a multi-layered floor.  I believe that this will help with dry time, and will also allow me to experiment with transparent resin dye in later pours.


The next step was to pour both Part A and Part B into a mixing cup, where I used a plastic knife to stir the resin together, stirring the rather thick liquid until there were no swirls or blurry areas in the mixture.  It went through a bit of a color change as the chemical reaction took place, and once the mixture was evenly mixed, it cleared up again.

I used a plastic knife rather than a wood tongue depressor or Popsicle stick because in reading up in preparation for this first test, it was recommended that for clear resin something other than wood should be used, as wood had the potential to introduce water into the mix, which could cause the resin to have problems in curing properly.


I then poured the resin very slowly into the mold, tipping the mold to move the resin around the mold.  The liquid was very thick, so I did have to dip into the resin with a knife here and there and "help" the resin completely cover.   As the resin self levels, these areas do not remain apparent. 

As I write this, I just realized I forgot to put in the release agent I bought to help ensure this would come out!  So, I may have already made a fatal mistake...we shall see. 


The results so far are amazing!  It is giving me that extremely high gloss effect I wanted...and I am getting a bit excited about the potential results!   If the color and shine are maintained as the floor dries, the final effect will be perfect. 

Now I wait for a couple of hours for the resin to cure to a somewhat jello like consistency, as at that point I am going to pour the second level, which I hope to add a bit of transparent dye to in order to create a beautiful amber cast to the entire floor.  

For now, that is where I am!  I'll post sometime tomorrow with where things went from  here!

Have a great day!

Doug S

Saturday, August 9, 2014

My Never Ending Story

Well folks!

I continue to work on that never ending project of creating a resin floor for my entry.  I get closer and closer, but you would never know it by the visual progress!

Everything is finally glued down!


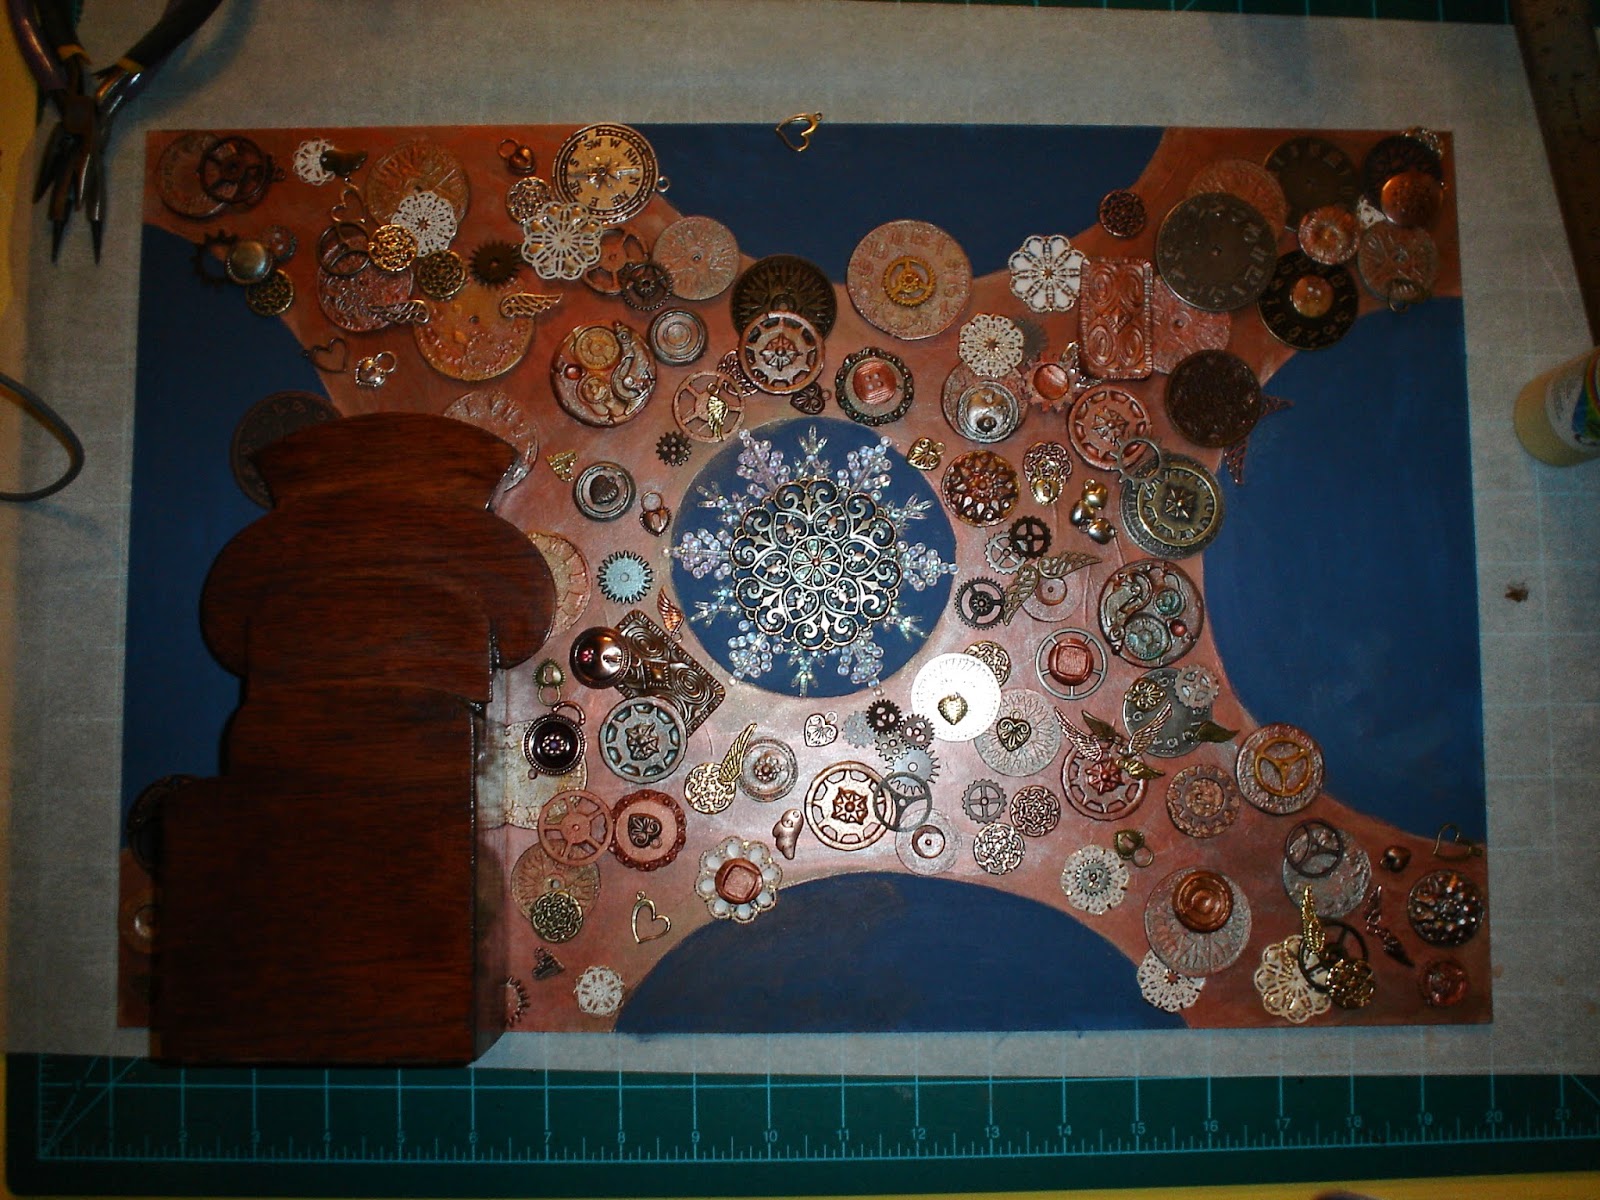
You see the floor above in the mold I made out of 1/4 inch plywood and Foam Core board.   I spent much of the day yesterday and this morning adding detail to the floor...in the form of very, very, very small watch parts.  Visually, in the photos, while you can see some of the changes, it doesn't hold a candle to the real thing.  

Those little tiny detailed parts added so much to the look. 


Considerable added detail made up of the tiniest parts...
I had to hold most of them with a tweezer!

I am ready now to pour...everything is attached in it's permanent spot, for good or ill!

This is the part I am just not sure how to ensure it works...I could lose all of my work if it doesn't!  And regardless of appearances, this has been a LOT of work!

To help manage my fears there, I have made a mock up mold that is about half of the full Entry floor, with the idea of testing out the pour.  I will be working with that prior to actually adding resin to the floor above. 

The Mock Up Mold...I'll make my mistakes on this one!


However, this project is officially on hold now, as I have to purchase the resin...the clear resin that I want to use in this project is rather hefty in price...so I have to wait until next week to purchase that...I've already tapped out my budgeted allotment for minis this pay period! 


Here is why....

I found it...I didn't MEAN to find it...but I did. 

The colors are perfect!


I stumbled across this tile at Lowe's Hardware...looking for other stuff...and immediately thought...Exterior Stone!  This is one of those purchases that was planned...but unplanned.  I had intended to use an extremely similar look for the exterior of the Chateau, but was thinking I would have to make it....but when opportunity knocks!  You jump.  


the TEXTURE is better!

I've been collecting this tile now for several weeks...a little at a time..it is much too expensive!!  But when opportunity....yeah... well... 

I have now spent my wad on tile for a future project, which means I get to wait a bit on the current one!  Sometimes it is worth it to sacrifice!

You folks have a great day!

Doug S

Friday, August 8, 2014

Lessons in The Composition of Steampunk Gizmos

Morning folks,

The  road to Steampunk has been a fascinating journey for this slave of convention!  It plays with most of what I call "good design".  The stretch has been very good for me!.

I am now at the stage with my floor build that I am beginning to "design" the Steampunk gizmos that will be in the new floor.  I'm moving beyond the basic resin castings to combining bits and parts to create the Steampunk vibe.  And in doing so, I am having to learn a new way of thinking.


My initial arrangement concept for the Entry Floor
When I was first laying out the concept for the Entry floor, I was laying out lots of little circles in somewhat regular and "balanced" ways...
you've seen the photos, but I'll bring one of them forward for your convenience.

Thinking I had done very well, I showed my concept to my daughter and my wife, who both oohed and ahh'ed quite appropriately, and then my wife stood over the arrangement and pursed her lips...

Photo courtesy of Andrew Mitchell - Flickr

now I know my wife...and pursing lips is not a good sign!

She walked away without commenting further....leaving me wondering where I had gone wrong!  After all, I was quite proud...peacock feathers up and waving...

Later that evening, she revealed her hidden thoughts to me in the presence of my daughter....she told me that she didn't think I was quite there on my Steampunk theme.

Flabbergasted, I asked why!  Upon which my daughter quickly came over to the table and joined in the great fun...

They informed me that everything was too uniform. 

(Boring, in some languages!)

Steampunk Industrial Composition by Valeriana Solaris - Deviant Art

"Steampunk is not ordered...it is unconventional...everything in your arrangement is too perfect."

At which point my daughter picked up all of the resin cast and metal gizmos and dumped them back on the table in a pile....and said...


"There, That is Steampunk!"  

Lo and behold...she was right!  

So that sent me back to the drawing board...looking at how to arrange and re-arrange the gizmos in a way that was more Steampunk-like!  

After much re-positioning, re-assembling, and a bit of confusion as I attempted to recreate chaos...I finally arrived at something like this....which I think you have also seen...

Second Stage Concept...less regular but still not feeling right

Still, in my heart of hearts, I knew that I had not yet obtained Nirvana...."Steampunk" was eluding me...mostly this just looked busy and chaotic to me...it was still missing that essential vibe.....

So..since then, I have been playing with gizmos...sorting, stacking, adjusting...overall, obsessing about it all.

Finally, I started just picking up the bits and parts and stacking them without thinking much about it...just dabbing something in here....a little something there....doesn't that feel a bit like a hole...plug it with this....and so on....

Then....the moment....(camera pans into my ecstatic smile)...

NIRVANA!!...

or at least as close as I could come!  So of course, I must share!

Here are some of the photos of the "new Steampunk" look...


Clock-punk?

I think I have finally started to "get it"...Steampunk that is... 


Sundial punk?

 "Its a chaotic mess that you have to balance just perfectly or it doesn't look right, causing people to point and laugh".  

Shield punk?


I'll let you be the judge of whether or not I succeeded in "getting the vibe", but I think I am getting closer all the time!  


Jewel punk?

Maybe I'll really be ready when I finally know how I am going to pour that resin over it all...
[he mutters to himself].

I'll save the rest for later, and give you something to look forward to!

Meanwhile, I HAVE also started building my mock up mold for the resin cast floor.... here is a quick preview.


I'll let you know how that turns out!

Until next time!

Doug S

Tuesday, August 5, 2014

The Indian Ink Affair

Hi folks!


Continuing work on the Entry floor....today I worked on aging the Steampunk items which will go into the resin floor.


I was very happy with the resin casting process and what I ended up with by painting several layers of acrylic paints.  I felt that they were unified in appearance, which is what I wanted, yet I wanted some variation in the depth of color and a sense of age.

I wanted to take the aging process further however, because while they did give the impression of age...they didn't LOOK old.  I am going for an aged but elegant look for this miniature house, so I wanted to improve the feeling of age.

I chose to use an Indian Ink wash to accomplish that, and I do feel that it was a smashing success!  I think these look now like aged and slightly rusty metal, which absolutely supports the look I want to create.

This process of aging with Indian Ink, like everything else, is totally new to me, so I was pleased that it came off.

Of course, I didn't start on the resin castings...I practiced a bit first.  My first try was with a couple of old earrings picked up at a garage sale as potential trinkets for the mansion.  These didn't work all that well...primarily because of the texture of the metal earrings.  As I progressed, I found a couple of buttons and some wood to play with, and used those to perfect the mixture.


I used Isopropyl Alcohol from the local Bartel's Drug, and Higgins Black Magic India Ink to age the items.

I had seen the technique on the Internet, and thought it would work well for what I wanted to do, but when I went looking for the magic formula to make my own, I could not find any real guidance on what the ratio of ink to alcohol should be.  So I undertook a process to figure that out.  

I knew that a little Indian Ink went a long way, so I started small...I put about 5 small drops into the rubbing alcohol bottle.   That didn't turn out to be anywhere near enough...it didn't even register when I applied it to any of the various surfaces I tried.  So I decided to incrementally increase the amounts.  I finally got to the right mix, at least to my taste, at 35 droppers full...yes, droppers, not drops!  


When I started I suspected that I was likely to use this technique often, so I wanted to just mix the whole thing up immediately..and store it for use later.   I am sure you could use a small jar and mix in a few drops and get the same effect. 

Once I got the mix right, I began brushing the Indian Ink on the resin castings.  I just used an old paintbrush. 


As you can see above, the effect is immediate...and dramatic.  It sets off the detail of the resin beautifully. 


Here is a before and after shot, which shows the transformation. 


I loved the initial effect, but true to form, I wanted to push it a bit farther.  So I went back in randomly and added additional partial coats to create more variation in each piece.   In the photo below, I covered about 2/3 of the casting again with the additional Indian Ink wash. 


I repeated the process several times, leaving large pools of the ink here and there initially, and progressing to smaller pools of ink to continue to build up the variation in the castings.  

When complete, each piece looked something like the photos below. I love the variation and sense of age that you get when you see these pieces now.  I think they scream Steampunk, and aged Steampunk at that!  It also had the added effect of disguising some of the small irregularities I had in some of the pieces since I was learning the resin casting process.  They just look like part of the aging process now!


This process was actually extremely simple to do, and was not near as messy as I expected.  I only have ink on one finger!   Definitely something I will be using on a regular basis throughout this build. 

Hope you've all had a marvelous evening! Until next time!

Doug S

Sunday, August 3, 2014

I think I'm going to think it out again

Afternoon folks,

I need to let you all know that while we do have some water damage downstairs, it seems to amount to a line along the join of the ceiling boards in the living room.  It is not horrific,but it is definitely there!   We are lucky it is a warm day, and that things are drying quickly.  I do think we are going to have to do some followup and remodel in our bathroom...the floor is coming up now...but all told, it could have been a lot worse!

Meanwhile, I haven't put the time to waste today...I've been working on the Entry floor again...

First, another photo of where I am headed...I took it a bit farther last night after I posted... yeah, I know I said I was quitting....I lied.


I wonder if you all can even see the changes...mostly what I was doing last night was practicing...trying to take things up a notch to create the Steampunk feel.  Things are closer and less regular, and there are smaller bits that are not the disks I have been working with...Overall, I think I like where it is going.

BUT, the more I looked at that floor, the more I realized I just didn't quite like it. It was OK, but it didn't look natural enough for me...so I went back to the drawing board.   This time I did a little better job keeping a record of how I got there...though I still think I fail there!  I just get too into what I am doing, and forget. 

Here is the process used on the second go around:


First, I re-cut the board, this time remembering to make allowance for the doors.  I totally forgot on the first set.  I still forgot on the entry door, but I think I can work with that one fairly easily, so I didn't reject this try.

I painted the new illustration board "Orange Orange" by Delta Ceramicoat, a very bright, almost translucent color.  I followed that by stippling with Americana's Mississippi Mud, using a sea sponge.  

Next I used the same sea sponge to add Delta Ceramicoat's Red Iron Oxide, which gave me a textured, mottled stage, which you can see on the right end of this photo. 


The next coat that you see in progress above is another Orange called "Mandarina" by Folk Art.  As I moved throughout all the coats except the very first one, I used a twisting motion with the sea sponge, which softened the textures. 

I added subsequent coats, using the same process, of "Venetian Gold" Metallics paint from Deco Art, "Warm Penny" from the same series, (a soft warm copper color) and "Ruby Royal", another metallic copper color from the same series of paints.  

Finally, I went back in with "Burnt Sienna" by Americana.  This gave me the basic look I wanted, which you can again see in the right side of this picture.  In progress below is another coat of the "Mandarina".  .


I finished off the main set of layers with a layer of the "Warm Penny" Copper.  Then I dabbed in both "Venetian Gold" and "Red Iron Oxide" again, very lightly, and wiped it out with a paper towel. 

The half circles each then got painted with a Latex Paint - in a Charcoal Grey. 

The final result appears as you see below.


I am much happier with this color combination than I was with the earlier version.  It does have a similar feel, but the textures look much more natural to me. 

Placed in the Entry, here is what it all looks like together. 


It makes me happy.  I think it is exactly what I wanted to convey with the floor.  The gold and copper colors are so shiny in this that my photos are turning out with a lot of glare...the picture above is the only one I got that really came out at all...I am going to have to get a better camera (and training to go with it!). 

Now  that I have all the coloring right for the illustration board, I will begin to actually attach the resin and metal parts to the floor, and add the resin to the whole floor.  My hope is that the entire floor will have a smooth, glass like finish.  We shall see...this is all new..so no framework to judge whether or not it will work as planned.  

I am still trying to decide whether I want to add the center circle of paint in under the center medallion I planned.  I'll think on it for a bit...and surprise you all later!

Until then!

Doug S