This post will be all about progress and the lack of it. Sometimes progress is one of those elusive things that does not show itself until the last board is in place. I've been working on the Manor off and on, in between the chaos of an extremely busy schedule, and while there has been a lot of progress, there is not much that speaks of any real beauty to come.
Most of what I have been working on is going to be "under the covers" at some point or another. Still it is progress, and I thought that you all might think I had died and gone to heaven or something if I didn't post, so here it is.

In the last few weeks, I have spent most of my effort on refining the design for the facade. And of course, most of that you will not see! Patience will be required while I slowly dredge the things in my mind out into the real world. In my quest to bring the imagined masterpiece to life, I have worked on adding coloring and assembling the previously built windows, adding some balance to the facade, and cladding the box windows in aluminum.

Step 1: You may remember my last post regarding the Quest for the Perfect Windows. The windows had yet to be painted, and this was my first undertaking. What I ended up doing with those is to paint the mount board with a copper color, and then used Indian Ink and Raw Sienna paint to age and stress those so that they looked weathered and aged, and like old metal.
They don't look like much set off by the white Foam Core, but they have a wonderful aged feel and they are similar in tone to the Steam Punk doors I last posted about, which pleases me, as it brings the color tones around the entire house (or will when I get finished!).
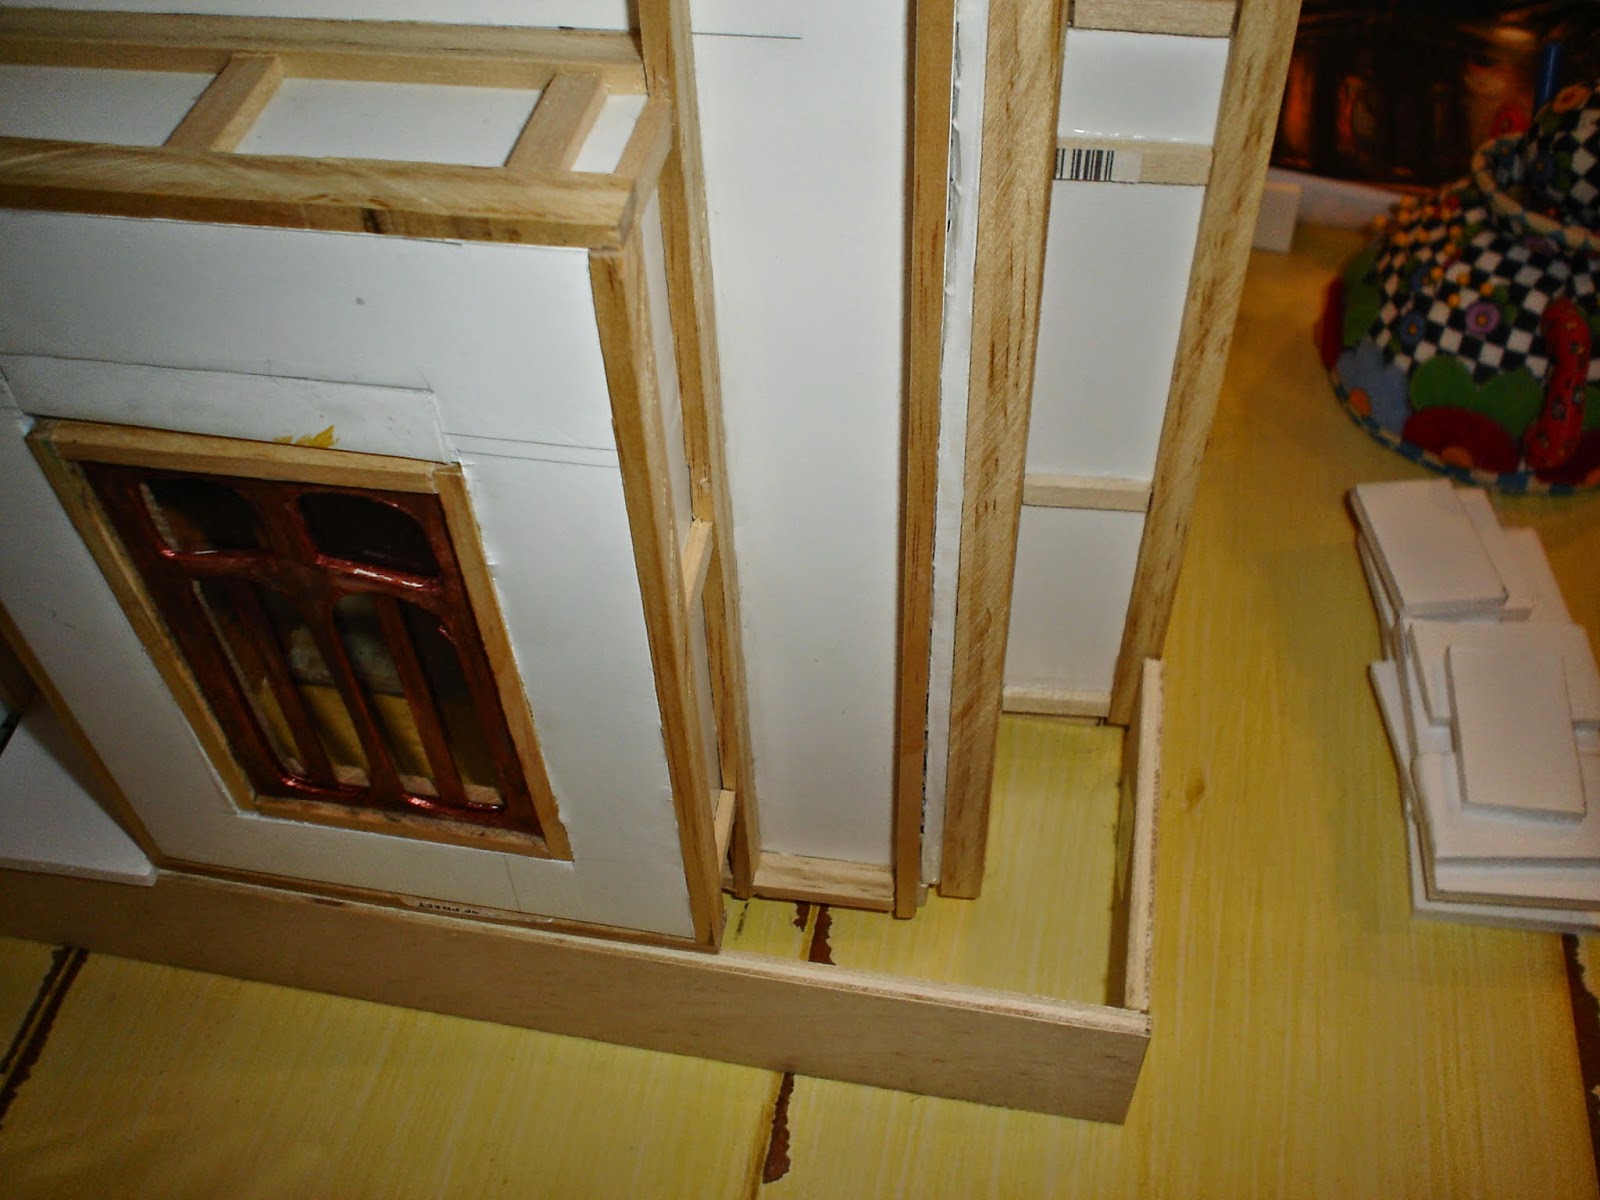
Step 2: I've wanted to create a Steam Punk Vibe with the foundation around the entire house, and I began work on this next. Again, no progress that looks like much yet, but I've created a wood base for the foundation that will help balance the front of the manor, and will provide a unifying element across the facade. I've several ideas that I want to pull together to create interest and add additional bulk to the foundation.

I've added a platform on top of the foundation pieces,with wood. Above, since I didn't remember to take pictures of that, is the Foam Core version, and only between the windows. The great reveal will be later in the post. You can take another view of the beautifully aged copper windows this way, right?

Step 3: This is the "interesting" but not necessarily beautiful portion of the post. Notice, you have just experienced the "big reveal"! Around the base of the module you will see the new wood base in it's full and unadulterated glory.
Now that we have that done, on with the rest of the story. I decided to overlay the window boxes with aluminum sheeting. What you see above is the underpinnings, so it is still Work In Process. I thought I would break down how I accomplished that, as I think it was an interesting process, and with a little more skill that I currently have, I think it could net extremely beautiful results. As it is, I am happy with it other than a bit of buckling in the aluminum that I will need to disguise.

This is what I started with. I purchased a sheet of recycled aluminum at 30 gauge from http://www.whimsie.com/index.html. The service was fast, and the recycled aluminum arrived in a strong packing tube and in good condition.

I used tin snips for the first cuts. I drew all the lines with a green felt pen to give me something to cut along. Cutting the metal turned out to be very simple to do.
Lessons Learned, I would use my utility knife (and did for the final two that are pictured). While it takes a bit more effort, the result is smoother and cleaner than using the tin snips, which caused the metal to curl, and necessitated flattening the metal again. You see above that the pieces are a bit lumpy, which was caused by the tin snips. It is easier not to bend it in the first place than to take out the unwanted undulations.

In order to manage the fold over the top of the window box, I cut the pieces larger than required to fold over the top of the window box. I cut flaps at the top to the depth of the box, so that I could fold over and glue the metal to the box. The first attempt, pictured above, ended up being too damaged to use, and was used to cut the patterns for the "new" ones. :0)

Prior to cutting the flaps into the "new" pieces, I painted them using Rust-oleum's Metallic Paint and Primer in One. The color is 'Flat Chestnut'. It leaves an incredibly beautiful finish, with a real depth to the color that adds a lot of immediate interest by itself. I put three coats on the metal, adding the paint in very light layers to build to the final color.

I then bent the aluminum using my metal ruler to attempt to keep the metal smooth. I laid the metal ruler along the lines I wanted to bend, and slowly bent the sides and top back to create the box.

I then glued the bent aluminum onto the window boxes, using, of all things, Arlenes Tacky Glue. I love that stuff. It will glue just about anything!

I left the base of the windows open, because there will be some details added there. I'll save that for a later post.

You begin to see the hint of the eventual effect by getting up close and personal with the windows. I am liking the overall effect. You can see above though that I had to cut away a bit of the aluminum to allow the window to go back in on this one. I'll have the exciting task of making that melt away over the next few weeks. :0( I figure it will be covered up by the trims, so have left it to deal with at that time.

Here is the other window looking onto the Butler's Pantry. It's a bit exciting to start seeing the effect that is being created.

I chose the deep brassy color for the box exteriors in part because I wanted to balance the Oriel windows in the next story. I like the way it brings the color down to the base of the house, helping to draw in the coloring I used above. This is a picture of the brief vacation the house got from me poking into it's corners over Easter. It's a lot of work transporting a bunch of modules up the stairs and rearranging them on the base board! Unfortunately, I hadn't put the windows back into the openings when this was taken, so you'll have to imagine for while.
The Future: Now I will leave you with a bit of a glimpse of the future. Not sure when I will be adding this detail, but it'll give you an idea where I am thinking I will go.

Here is the baseboard trim (real life size!) that I bought to use on the wooden foundation that I have added on both ground floor modules on either end. I'll be cutting it up and using it as part of the decoration for the foundation. Still working out the details!
Until next time!
Doug S
It's hard to keep the momentum up when a lot of the work is structural but, as parts emerge, you begin to see what the final design will be. If you're not standing still, you're moving forward right? I love the flat chestnut paint on the aluminium. It looks very warm and rich. You're doing well Doug, keep it up =0)
ReplyDeleteHi Pepper. I love the color too. I do keep plugging away, and I have already amazed myself at the things I have been able to do that I have never done before just by plugging away. Thanks for the encouragement!
DeleteI love that color too. I may find it creeping into other parts of the project! :0)
Hi Doug, it's lovely to see a progress report! I know you might feel you don't have a lot to show, but really, it's all coming along really well! I love the colour of the metal, it really does help to carry the colour of the wonderful upstairs windows down through the build. The base looks very interesting, and I'm dying to see how you work that! Seeing the manor in the picture, really shows the sheer size of your project, wow! Every little bit done is always takes you a bit further forward. It's looking brilliant, and I'm eager to see your next progress report! :)
ReplyDeleteAll the best for now
Vivian
Hey Vivian. I KNOW! The wicked thing is monstrous, and I cannot believe I got myself into a project this size! And to think, this project is SMALLER than the one I originally thought I wanted to do. One thing that seems to be part of my DNA is that I tend to do things Big, and this is true to form. I know I will love every minute of it, but I will admit to wishing already that I had started smaller!
DeleteI'm excited about getting to the base detail, I have some fun ideas that I hope will turn out the way I imagine them. I do feel like the structural work is not all that exciting to see, though I actually enjoy doing it a lot. It will all start coming together soon, and will make a huge difference when it all does. I am excited about the future.
Thanks much!
Doug
Hi Doug! I think that Pepper and Vivian have both said the same as I also thought, so I agree with them ;)! I see that your are moving forwards step by step with your wonderful and special steampunk house.
ReplyDeleteI love the flat chestnut paint on the Aluminium too, it has such a warm 'metal' color. I love that bay window on the first floor, it's awesome :)!
Again I have learned something of you about building the structure of a house.
I can't wait to see more of your progress.
I wish you a nice week.
Ilona
Hi Ilona, I am glad you are learning! I love that anyone can learn from my humble efforts at all, so you make my day by letting me know that. I'm excited by the windows too, I think in the end they will make this project unique, and as you may have already seen, I am drawn to the unique.
DeleteI can't wait to see more of my progress either! :0) Its a little like playing the lottery. . . Will it really come together? lol. I'm playing Wheel... Of...Fortune!!!
Thanks for stopping by!