Greetings,
Strange happenings at the faucet.
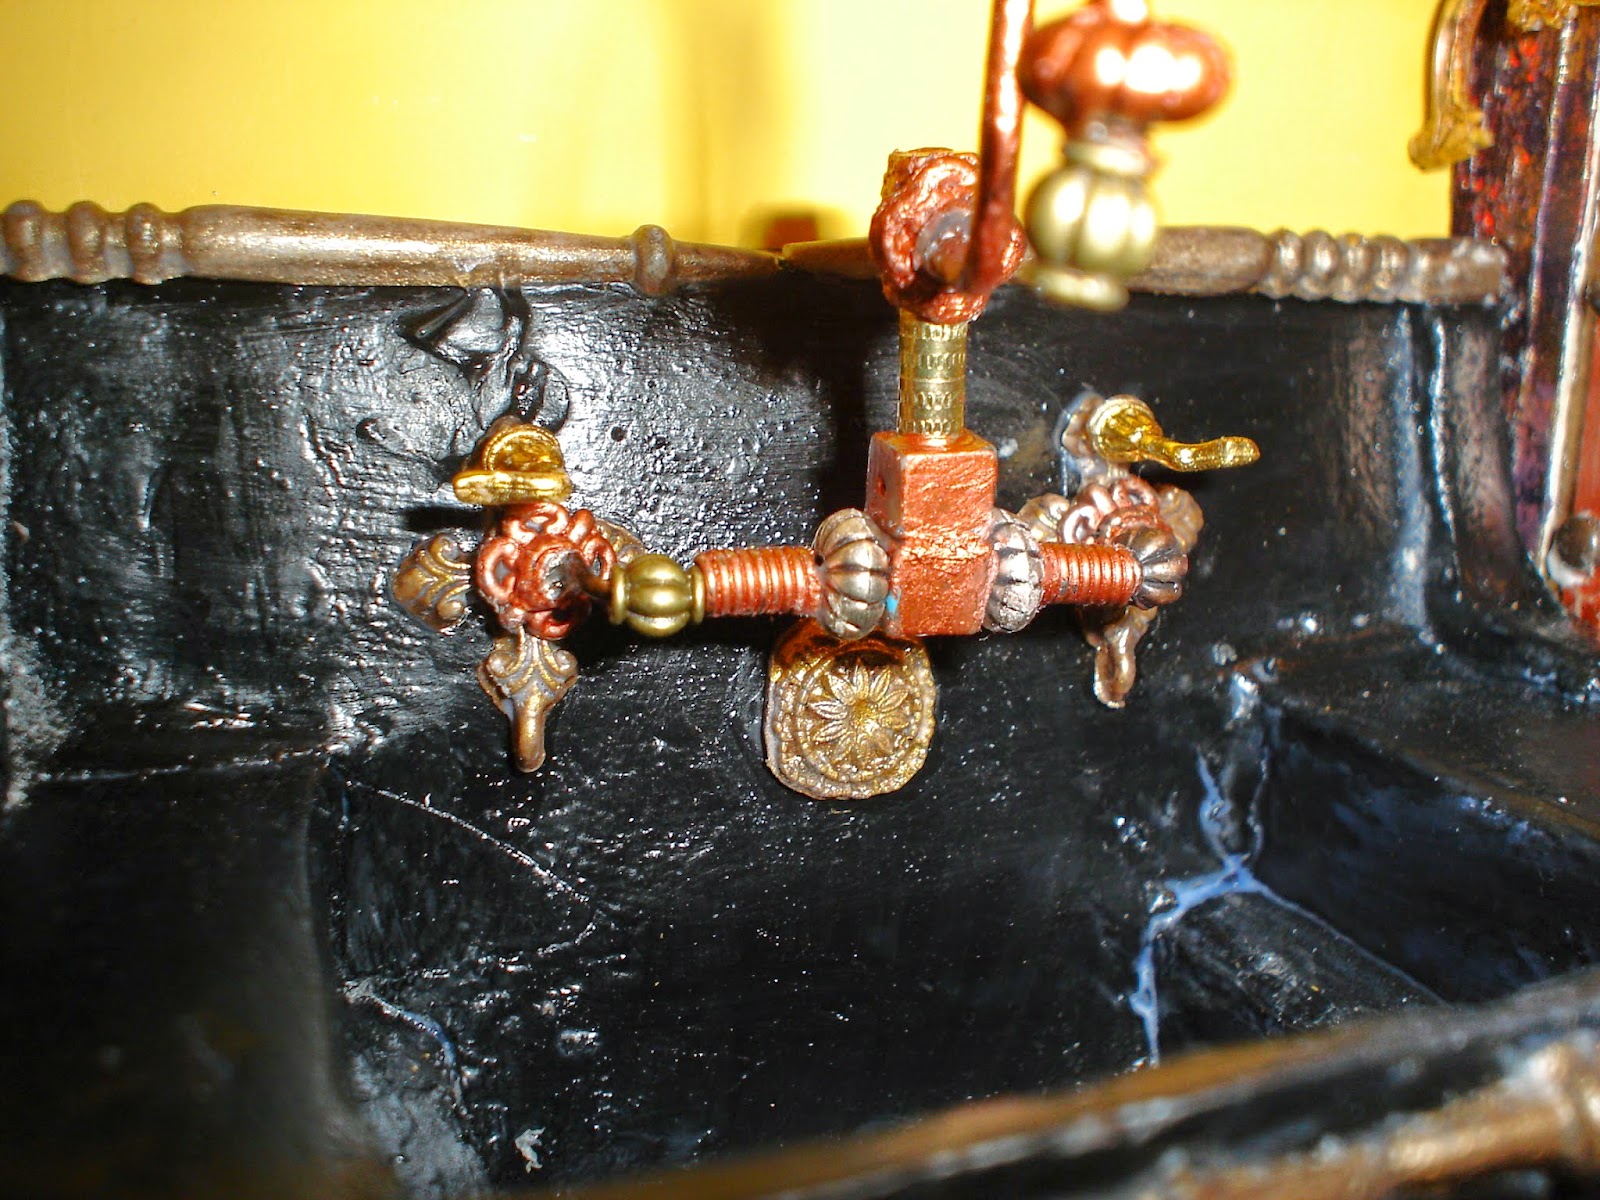
Sink has a faucet with a Steam Punk look and a spout able to rotate.
When the hot tap is turned on fully the water runs warm only
and then runs cold and back to warm again. It never runs fully hot.
The sink is a couple of feet away from piping hot water.
The supplier says to switch the cartridges between the Hot and Cold
levers. This does not sound right. Its a fancy Steam Punk brand.

Some insight would be appreciated.
Oh the joys of learning on the fly! I've had a fun couple of weeks [yes WEEKS] figuring out my Steam Punk Kitchen Faucets. The lessons learned are too many to list, so I'll provide you with the short cut! How is that!?
Nah! That would be no fun. So I'll show you how I made a set of Steam Punk Kitchen Faucets with only a COUPLE of side trips. Rest assured, this was only scratching the surface when it comes to detours on this project!
The funny thing is, once you "know what you are doing" (maybe a stretch!), this little project is actually fairly simple to accomplish. I'll attempt to impart the great wisdom I have gained as I wandered far and near. This should make it very simple for 'the next guy'!

Presenting the materials required for this project. So Simple. Beads and wire, Beads and Wire. Simple. SOOOO Simple. Yes. So Simple.
I should share that this idea was not my own. I stumbled across a tutorial at Nasu's Dollhouse, which I adapted to make this faucet set. Hers is much more professional looking... I'd tell you it is my photography that caused mine to appear less polished, but I would be lying!
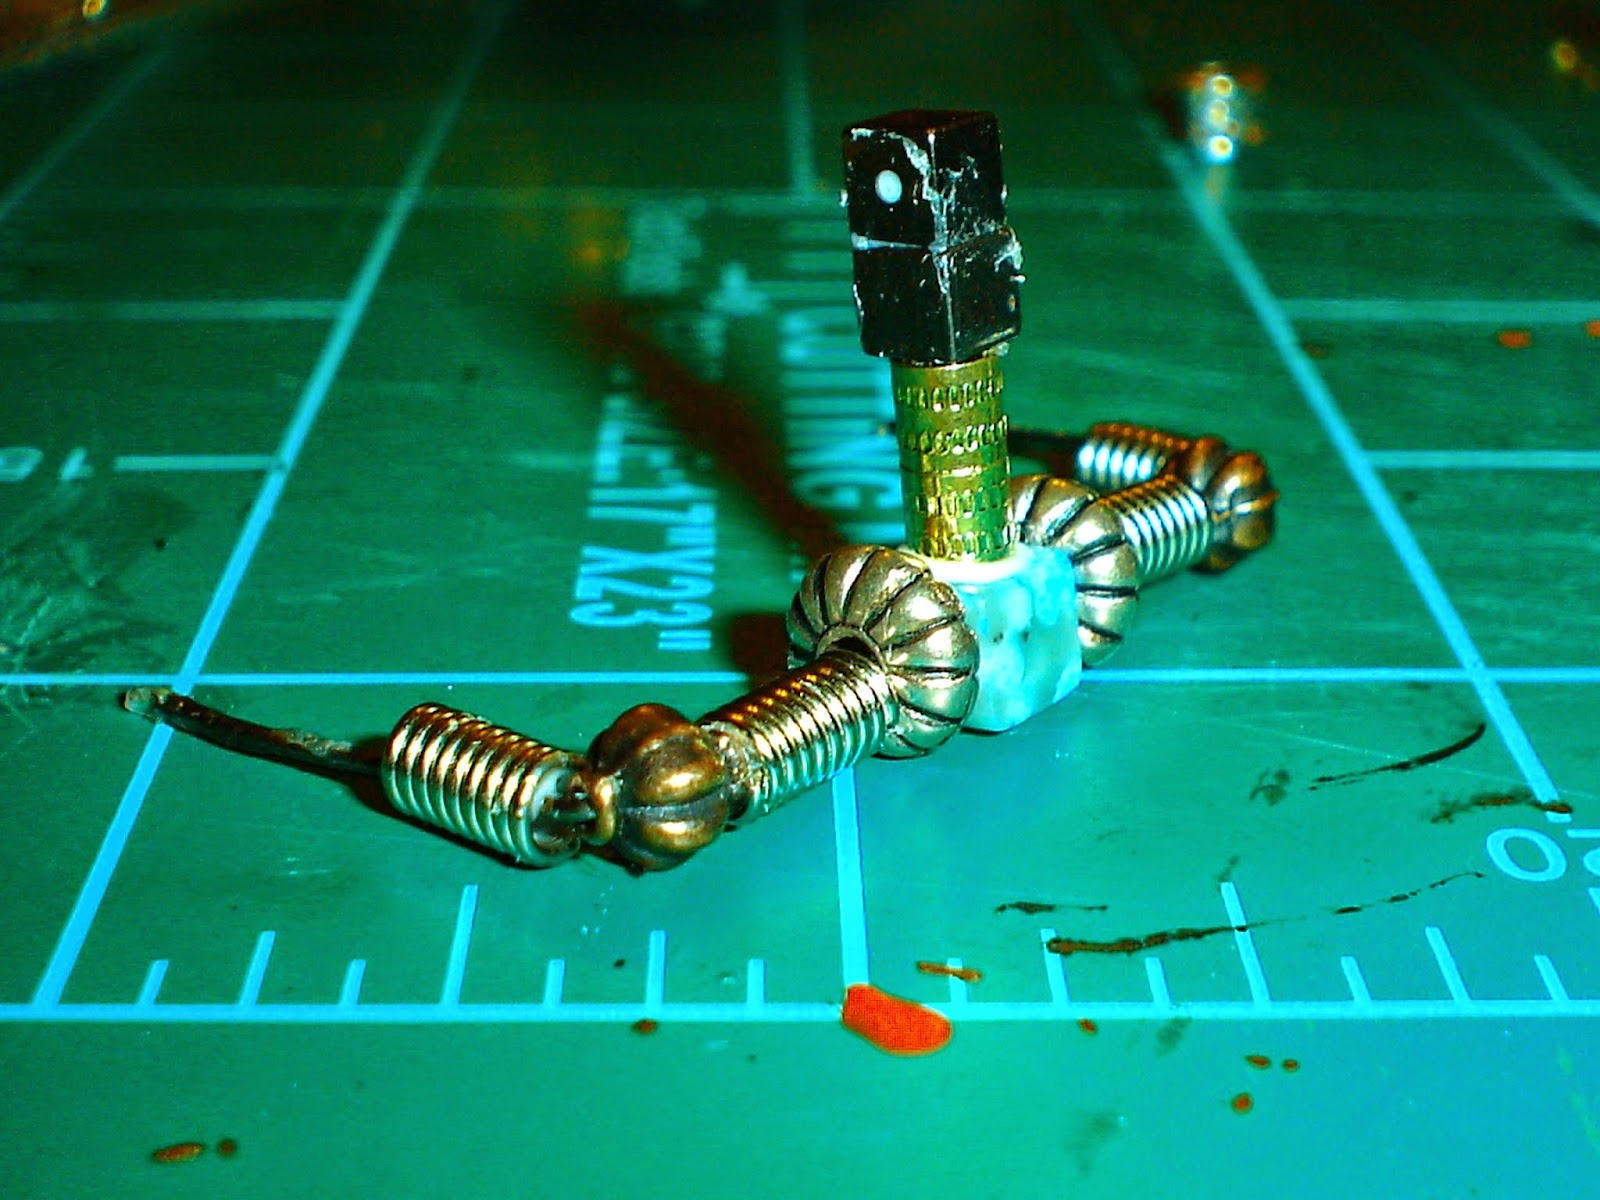
OK, back to the faucet tales. I used various beads, some very small springs, and 20 gauge [modify that to 16 - Lessons Learned!]. I had to do it over again, because the wire wouldn't hold up the final product! So use 16 gauge wire if you are foolish enough to try this at home!
 |
| Droopy faucets :'(( |
Once re-assembled using 16 gauge wire, the outcome was much better. But I get ahead of myself.

Using the assortment of Steam Punk themed beads and wire, I strung the beads onto the wire, and bent the ends to create a return on both ends. Each bead was glued [Lessons Learned dictates Super Glue for those quick on the draw!] to the wire, so that it remains stationery.

This is one of those beads that is threaded to use as a clasp on a necklace (no I don't know what they are called!) I glued the connector bead on top of the squared bead in the center to create a pipe traveling upward. By using this threaded piece as a pipe routed upward, I have a "working" faucet. [OK, no. It just swings from side to side. Nice, huh? :0)) ]

For the faucet itself, I used 12 gauge wire, and bent it into shape. I super glued a bead finding at the base where the faucet would meet the wall.

I super-glued two additional beads to the faucet end to create the spout. [For the observant ones, this was NOT superglue on this photo. Another lesson learned!]
Added two additional square beads to the top of the connector bead . . .

and then added some additional beads to create a decorative element. I painted several of the beads to a copper color, to create the elegant metallic effect I wanted.

Painted the faucet assembly. . .

And assembled the entire thing using a combination of Arlene's Tack Glue and Superglue.
This is the point at which I discovered my droopy faucet problem. I could not get the wire to hold up the assembly, as the weight of the beads and wire was too much for the 20 gauge wire I had used.

As you can see in the above picture, the entire assembly looks just slightly different. I used the same exact processes, but used 16 gauge wire instead. You can just see the difference in sturdiness. Much better.
I also shortened the returns on the wire, and left off a couple of the springs on the rebuilt faucet assembly, again in an effort to solve my droopy faucet syndrome.


I added the small Victorian faucets which I bought at the Seattle Show, and declared the sink done!

Oh. Of course I must share the tiniest little detail, yes? I also did another little project to add final details to the Steam Punk Kitchen Doors. I added some door handles. Worth sharing, right? :0)

That's all there is folks! Not so much for four weeks is it? Some battles are hard won, but those are the better for it!
I am excited now to move on to the Box Windows on the Exterior. I have some wonderful ideas for those, we'll see if I can pull them off!
Until next time!
Doug S
P.S. I really did find the opening piece on this post in a forum. I thought it was funny, and tweaked it a bit to fit my post. No, my house will not have running water [THIS time!]
Hi Doug! Might I say that it was a great pleasure to meet you in person at the Seattle Show and I hope that you were able to find a few things to add to your Steampunk Manor. :)
ReplyDeleteI LOVE your custom faucet and taps, and not only do they look Steampunk, but they fit the proportions and the visual weight of this sink! Using the copper finish was such a great idea and so is the gooseneck.
Two thumbs UP! :D
elizabeth
Elizabeth, the pleasure was all mine! It was fun to put the right face to the name. :0)
DeleteSo glad you like the faucet and taps, they were fun to muddle through. I have always loved the bridge faucet with a gooseneck, and wanted to try to recreate it here. For a first, [er third?] go, it came out ok! lol
I learn so much when I take on these new little projects. I look forward to going into something with a little experience under my belt! Meanwhile, I muddle through things very happily.
Hi Doug! I think making this gorgeous steampunk faucet and taps was more than worth to take so much of your time ;)! And yes, I did wonder where you were all that time ;o, but you were busy with inventing some wonderful miniature findings, thanks for sharing! You have found out, on a creative and inventive way, to design these miniature items for your steampunk kitchen, but the result is absolutely stunning!! I love to see that copper paint you always use for your project. It has such a wonderful copper shine, it looks just like the real copper pipes.
ReplyDeleteSuper glue can be a wonderful thing.....I agree with you, but I've used it once (many years ago, but I still know it very well ;O) and it glues really everything.......including the skin of my poor fingers it wasn't quite funny for me to get rid of that stuff and to save my fingers LOL!!
Wishing you a nice Sunday and week ahead!
Ilona
PS Last weekend I've visited the biggest international Dutch miniature show in Ulft (this time it was just 'around the corner' for me) and it was so great to be there and see all the miniature beauty!! I've met so many kind people, who shared with me their passion of making miniatures, I've enjoyed it so much :D! I was so happy to find some nice miniatures, like the great chair for my granny in my last blog post, it is one of them, so stay tuned for more......;O!
Hello Illona! Yep, I was heads down (in between episodes of nearly giving up!) trying to create pipes. There have been a few side trips for real life in the last few weeks as well, between it all, time moved faster than I did! I am pleased that you like the result,
DeleteOne of the nice things about going Steam punk with this project is the ability to use [faux] metal finishes throughout. I really am loving the way it all comes together, and that copper paint is one of the ones I obviously love using. It is a product from DecoArt's Metallic Series called Royal Ruby, It does have a wonderful shine.
To tell you the truth, I was "driven" to super glue with this project, I've never loved it because of exactly the reasons you cited. My past experiences with super glue have been disastrous! One time I not only had it on my hands and clothes, but managed to actually get it on my FACE! Now that was not cool. So this time, when I bought the glue, I was careful to try and find a package with a good applicator that I thought I control. I succeeded in that. I found Loctite Super Glue Ultragel Control. It comes in a small bottle with sides that squeeze, and the glue doesn't come out until you squeeze it. I was even able to leave the bottle "open" on the table while gluing without it drying out. Good design on that bottle. I highly recommend it!
I loved that little chair you bought for "Granny". Those shows are awesome, aren't they? So many talented and wonderful folks together in a room, and the things they turn out amaze me. I look forward to seeing what else you have acquired!
Best wishes! Doug
Hello Doug,
ReplyDeleteThat is AWESOME! The faucet is just amazing. It is a piece of sculptural art in itself and is so perfect for steampunk. Excellent work my friend. I am so thrilled about your work because you are always so true tot he style that you want to recreate.
Well done!
Big hug,
Giac
Hmmm... Sculptural Art? Wow! I wonder if I can get rich? :0) I really was trying to get the Steam punk vibe, and I think this time, I managed. I am finding it a real challenge to think "Steam" rather than just vanilla "Victorian". [Can Victorian style be called Vanilla? I think not!]
DeleteI hope to be able to pull off a full Steam Punk flavor throughout. We shall see. Given my 'green behind the ears' status, anything could happen!
Thanks Giac!
Hi Doug
ReplyDeleteThe taps are just lovely. Wonderful work as usual. You always find the right balance with everything you make for your Manor! It's a pleasure to read your blog...always!
All the best
Vivian
PS Sorry for the short reply, but I'm just home from the NEC Miniatura show, and I'm exhausted......I'll try to get a post up soon about my time there!
Hi Vivian! No worries! I am not grading on comment length! I totally get the tired, I've been there a lot lately myself.
DeleteI am just pleased that you wanted to comment enough to do it when you were tired! :0)
I look forward to seeing your loot! I love seeing what people find, and love to see how they later use them, such creativity in the world, and I revel in it.
Get some rest! Then get on the stick and post for all us mini junkies!
Thanks Vivian! Be good!
Doug
That faucet set is a work of art!! Even though I'm not a fan of steam punk per se I absolutely love what you've done so far. It's certainly not vanilla Victorian, and I'm enjoying the rather Gothic vibe :)
ReplyDeleteThanks for sharing the info on the new superglue, anything that makes it easier to work without permanently attaching one's body to one's work has got to be a good thing!
Thanks too for coming by my blog, I think that so far the salon walls have had about 7 coats of paint including washes and sponging applied here and there, not entirely sure that I've finished with that yet, I think the dining room walls had about 10 or 12 before I decided they were done. Your copper paint is truly beautiful by the way - so rich.
Hi Norma!
DeleteThank You so much for your comments! You know, I am a fan of only a part of the Steampunk movement. There is an element of richness and uniqueness that I absolutely love, but I am with you on so much of what has become associated with Steampunk. There is an element of what has become popular that I don't like much.
That superglue was a great find, wasn't it!? I am so Thankful to have found it, because there are times when you really do need that quick drying steel hold. As I alluded to in the post, I have had some horrible experiences with Super Glue! I hope you will benefit from that bit of knowledge!
Your blog was one of the first I read through beginning to end some time last year. I've enjoyed it, and enjoy your artistic point of view with your work. I've posted on this blog a couple of my painting episodes. I love what layering paint does to things. It gives them a depth that you cannot get by slapping paint on something. So while it is time consuming to do so much layering, I think it is worth it in the end.
Thanks again for stopping by! Hope to see more of you!
Doug
This comment has been removed by a blog administrator.
ReplyDelete