More Pages

Showing posts with label Grand Parlor. Show all posts

Friday, May 22, 2015

Steam Punk [Art Nouveau?] Window Progress


Hi folks!  I hope this finds you all well and happy!

It's been a day or two (try nearly two weeks!) since I posted, and what I have to show you today is what has been done in 15 - 20 minutes a day over the last several weeks.  Life is incredibly full nowadays and what little time I think I have, I often don't feel quite up to the thinking!  But some small Progress we have, and so Progress we shall report.


The "finished" Grand parlor Windows


I left you with the basic wood shapes cut and formed for the Grand Parlor Windows.  My efforts have been focused on both the Window Box itself and finishing up the Windows themselves.  I have not installed them permanently, and won't until more has been done inside, but they are as far as they are going to go for now.  I will not be finishing up the trims and covering the base windows until much later in the build.


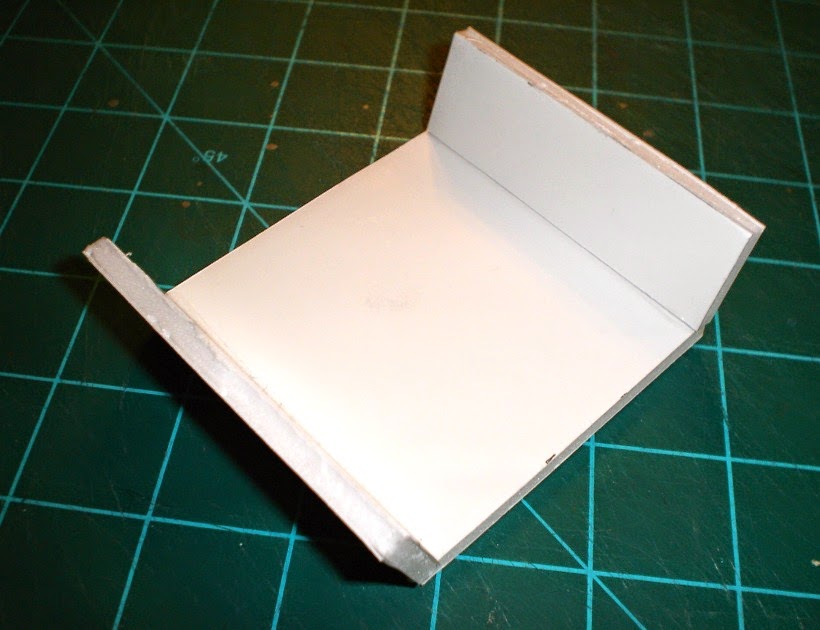
The unfinished Steam Punk Windows, for comparison!

I will tell you, from the point above, to where I am now on these has again been quite a journey!   My muse left me on a somewhat regular basis!  Silly muse...cannot keep him on task.

These windows are actually quite complex...with many steps.  I have been working on them well over a month by now.  I watch all of you put whole rooms together in a month, and I somethings am "moved to despair" thinking I will never finish!   I tend to "look", "stare", "mope" and "emote" my way to a final design for each step..  The whole process leaves me feeling like mush!  I don't know how you all do it!


"Tuxedo" Windows!


Anyhow, my first steps were of course to sand, paint and stain the windows.  I used a black acrylic on the outer trims, and a beautifully red tinted wood stain from Min-Wax named Gunstock.  I loved the effect, it created a "Tuxedo" effect that I find enchanting.  I added the Wire Details, using 4 rods this time rather than three, since the windows are larger, and I wanted to "fill" the space visually.


I then glued the mount board pieces I used to box the window together and Spackled the edges, painting the box ends again, until I had a reasonably smooth, well covered surface, and added a layer of satin varnish to give the boxes a "metallic" sheen.


Cast Resin Detail

I cast the resin "wrought iron details" to match the kitchen doors and pull the two ends together from a design perspective.  I purposely worked to "relate" the two ends, without duplicating the details slavishly, as I think that is one of the keys to creating interest...everything "goes together" but there is always something new around the next corner.

(Please forgive all the steel wool dust!  Arghhh!  I have so much to learn about Photography!)


Hobby Lobby find!  Fairy Tales line by beadtreasures


The last steps were to coat the entire thing with the same satin varnish I used on the end boxes, and to add a bit of detail to the base.  The metal "shield" on the base is simply a charm from the "Fairy Tales" line sold by bead treasures.  I just cut off the top using my jeweler's pliers, and glued it straight on to the wood, as is.  I like the "pop" of the metal against the warm wood colors and accented by the black.  

Those "empty spaces" below the window are very tempting...  So many possibilities!


I am especially excited about the interior view, which at the moment,doesn't look like all that much, but will be gussied up as part of the interior trim work.  That is much farther down the line...so we'll just have to be patient.


The Completed "Steam Punk" Window...why does it look so Nouveau? 


For the moment, these Grand Parlor windows are as far as they will go.  I'll be adding additional trim to the outside while working on the interior trims, so a truly "finished" window is a few weeks away at best!

My next steps will be to move around to the front of the Manor, and add similar related details to the base of the windows along the front.  I say "similar" but never forget...nothing happens the same way twice when I am building things!  Who knows what extraordinary things are yet to come?  (I'll tell you a well known secret. . . even I don't know!  :0)

I'd like to welcome a few new followers on board!  I am excited to share this journey with you, and to learn from you too!

Until next time!

Doug S

Saturday, November 22, 2014

The Secrets of the Nautilus Shell


Welcome back folks!  

I think that one of the most beautiful shapes in nature is the shape of the Nautilus shell. These shells are actually the natural protection for a very small octopus. Their graceful curves and myriad of colors are truly amazing, and there is a gracefulness and elegance that echoes the beauty found throughout nature.   


So when I was designing the floor for my Grand Parlor, guess where I turned!  I  The parlor now has two inlaid Nautilus shells that reinforce the undersea theme, while lending a grace and elegance to the space that belies the playfulness of the undersea concept.  A perfect device for my Steampunk Chateau!


The Chambered Nautilus Shell 

In fact, the nautilus shell is a perfect demonstration of the Fibonacci Sequence, which is a principle that was understood by mankind as far back as 200 BC.  We use it in math, science, art, and literature as a method to obtain balance and proportion.  So it truly can bring a sense of elegance to a space, whether used literally, as I have here, or used to develop the arrangement of space without direct reference to the shapes.  If you want to see more of how this principle is found throughout nature, you can watch the video I posted here.

Now I told you that these Nautilus shells in my parlor are inlaid.  But I have a dirty little secret.  They really are not inlaid!  Following I'll share my little secret with you, so you can see what a deceiver I really am!


I found a pattern on the Internet that I thought I could use as a pattern for the inlay.  And I actually DID start out trying to cut it all out and inlay it.  But if you will note in the photo above, the center of this pattern (and all nautilus shells!) gets extremely tiny.  This proved to be too much for the designer to manage, so we went to Plan B. 

I took the pattern and enlarged it to the size I wanted, and then cut the entire pattern out with a combination of a 360 degree X-Acto knife (pictured) and a pair of nail scissors!  This took me a bit of time, of course!  I was glad to finish up that piece of this effort.  My hands were sore before I was finished!


My original plan had been to create a copper inlay using those Oh so useful copper paper plates that would lay over the green and white floor, to create a counterpoint between the greens and the copper color.  So I decided that since I could not figure out how to cut the inlay with the paper plates, that I needed to paint the original design a copper color.  Above you see me in the process of coloring the black to become the copper color I wanted. You see the original printed paper with the design, and two of the cutouts I made, one painted and the other in progress.  


Since I was using the black background anyway, I decided to feature it as part of the shell pattern, which gives it a tad bit more dimension.  I love the look.  

Pictured are the finished paintings laid on the paper destined to become their final home.  They have not been glued, so you can see the curve in the paper caused by the paper retaining a memory of the contortions I took it through.  I would never forgive someone that did that to me!  


I glued the paintings onto the scrapbook paper I am using as the flooring, and completed that little task.  As you could see in the photo at the top of the post, the effect is rather magical. 

You will also remember my struggles with the fireplace.  After my last post, I painted the entire white portion of the fireplace surround with a Floating Medium and White paint mixture, which knocked back the dirty look, leaving the fireplace looking fresh again.  

I added several coats of Liquitex BASICS Gloss Varnish, which added a nice sheen to the white trim, and gave it some additional interest.  I think the effect is nice.


The jewel finding at the top of the mirror was black stone and brass trim.  I decided to take all the brass trim to white, which I think tied it in more to the rest of the mirror.  Unfortunately, those fine motor skills I discussed above have not been as finely developed as the job required, so it is not as clean as I would like it, but it is clean enough that it does not detract from the look in real life.  


Lastly, I covered the chimney breast with that lovely copper colored paper plate!  It ties the chimney breast into the rest of the room, I think, and sets off the white trim on the fireplace nicely.  There is much more to do to add the realism I am looking for before completed, but it is as far as I will take it for now.  I will finish it off when I do the rest of the interior trim for the room. 

At this point, I began to glue the floor down.  The scrapbook paper is now glued down on mountboard, which is then glued to the base of the room box.  


I also added Styrofoam and mount board under the copper and wood floor in the grand parlor.  The floor had warped a tad when I glued the veneer and paper plate onto the Foam core board, so I needed to flatten the floor, and also give the top surface support so that it will not cave in if it ever gets hit hard.  I don't imagine that would happen. . . but  you never know, do you!  Maybe one of the automatons will go haywire or something.  It is important to be prepared! 


Thus, we have now arrived at a final picture that is finally beginning to look like a room!  It is exciting to see something finally coming together.  I have been working since January of 2014 toward the point that something starts looking like a room, so it feels good to be there, even though I am still a long ways away from finishing!   

I still have some surprises up my sleeve for this room, but you will all have to be patient.  Those additional renovations will not take place until the three modules that make up the ground floor of the Chateau are attached.  

So, watch for some new activity in the kitchen soon!  

Until next time!

Doug S

Wednesday, October 29, 2014

Faux Coral Reverie

Hi folks,

I've continued work on my Grand Parlor miniature fireplace since my last post.  This has been fun!


My first step in bringing this fireplace surround to life was to create the texture that will become the basis for everything else.  And to do that, of course, I am continuing my underwater theme.   I wanted to create a texture that "lived well" in the space, and what better than creating the impression of coral?


To establish the texture I wanted, I used a test piece of Foam Core, Unsanded Adhesive and Tile Grout, a putty knife and an old toothbrush.


I applied the unsanded grout to the Foam Core Board in about a 1/8 inch layer, maybe less.  Just enough to give the grout depth that allowed me to manipulate it for texture.


I actually went over the entire fireplace once to establish the basic texture, and then re-stippled the entire surface again after a couple of minutes to improve the texture impressions and make them a bit finer to match the scale of the house.   I then took a piece of fine sandpaper to knock off the points of the stippling.

When completed, I ended up with a nicely textured fireplace.  I've placed a small frame (you've seen this in other places in the house already!) to help me get a sense of the size and effect of the "completed" fireplace.


The final Overmantel will be quite different than above, but again, this is that "visual cue" thing I have to do to really plant the vision in my head.  I think this visual process I have to go through is all about proportion.  I seem to be able to "morph" my ideas in my head, but I also seem to need the visual cues to help establish proper scale.   Unfortunately, I am not the guy with the calipers and fully realized drawings in place before I ever touch anything.  I've tried. . . and it ALWAYS fails.  So I live with my little handicap.  :0) 

As you can see, I also put a few pieces of Foam Core Board around the edges of the Overmantel to assist my visioning process. 

Having established the basic texture I wanted, I now turned to determining the right "shade" of color for the fireplace.  


The technique I used to obtain the color was to use Floating Medium. . . That wonderful invention that helps to keep paint from totally covering the piece.  I used very, very small amounts of the paint that I used for texturing the walls of the parlor.  

If I had to guess at ratios, I would say that I put about 2% paint into 98% Floating Medium.  I played with the amount of paint until I got the coverage I wanted.  It is hard to see in the photo, but there were about 5 tries...the final one on the right is what I decided upon. 


Above you can see the textured and colored fireplace.  I wanted this very pastel effect, because this is going into a room that is highly colorful, and I don't want the room to look like a circus tent!  This understated, pastel green does not look all that great on a white background, but it comes alive when put into the room.


I then added all of the base trim to the front of the fireplace, using mounting board.  The "carved medallion" is painted white, and the background of the medallion is also stippled just like the fireplace to create a textured (coral!) background.  I used a very, very light touch on the medallion texturing, because I wanted to ensure that the texture was an impression, and not otherwise noticeable.


Here is a shot with some of the decorative detail laid onto the colored fireplace. The little metal swirl is a copper paperclip.  This was taken before the medallion and other base trim was glued on.


I've progressed to the point that all of the base trim has been added, and the mantel has been painted and glued on.  I did decide to just use the mount board for the mantel, as I feel it is quite realistic looking as is.   I have more trim to put onto the fireplace surround to complete the portion of the trim that evokes that art noveau effect, and of course, will be adding the fish and seaweed detail to the front, once it has been prepared and colored.

I am excited about where this is going!  It is a bit fanciful, but I think that still works with the Steampunk Theme, so I am staying with it.

Next steps?  That scary "feature" that I mentioned, and the Overmantel!

Wish me luck!  I have ONE piece of wood for my "feature", and I am very unsure of how to accomplish what I want to do...so again, I stretch beyond my comfort zone!  But isn't that what all this is about? Learning and creating. . . pushing the envelope.  I have a love/hate relationship with that process!

Until next time!

Doug S

Sunday, October 26, 2014

Fireplace Mantel Mockup


Howdy folks!

Before I do anything else, I'd like to welcome two new followers! Thanks so much Elizabeth and Ilona, I look forward to getting to know you!

I wanted to share with you the next project I am working on for my Steampunk Chateau.  Its been a very, very busy couple of weeks, we've had a visitor and lots of "extra" activities recently, so I haven't been terribly focused on the miniature scene.   As a result, I've not gotten too far along on the project, but since this fireplace surround is a complex project, I thought I would go ahead and get started on posting about it. 


First, I'd like to share my inspiration fireplace surround.  You can see it above printed out with my printer that is on its last legs, and is also about out of the black ink.  :0) 

I absolutely love this Art Noveau fireplace surround, and was originally going to place this in the Entry.  But as you know, I decided to use another fireplace surround that I purchased at the Portland Miniature Show in the Entry, so this idea was still out there, and I decided that an adaptation of this was truly perfect for the Grand Parlor I am working on right now. 


As you see in the inspiration photo, there was no firebox with the surround, so I get to make up the rest!  I started by building the firebox so that I could set the depth of the fireplace surround appropriately.   


I added the front and sides to the "assembly" (its all propped together right now!).  The small dots you see in the back of the firebox are straight pins holding the wings of the firebox to the back while it dries.  I really love working with Foam Core!  It substitutes for wood in so many places, and in the finished product, you would never know! 


I also added a back to the fireplace surround that fit just behind the firebox.  It is hard to see in this picture, but that back goes about twice as high as the base.   


The inspiration fireplace has a carved medallion in the center.  I wanted to emulate that.  I created the design for one half of the medallion on one piece of mounting board.  I cut out that piece to create a template to use to ensure that both sides of the medallion matched.  I then used that (half) template to draw out the above piece, using the center line to make the two halves of the medallion the same size. 


I also wanted to preserve the carving around the center medallion in my version of the fireplace surround, so I also cut those from the mounting board using the same basic procedure. 


Here is where the fun begins!  My daughter donated a pair of beautiful, but broken, earrings to the cause, and I cut the bangles off of one of them with a wire cutter designed for working with jewelry.   


Here I begin to depart from the inspiration fireplace, since when I was playing with placement, I decided I preferred the jewelry bit placed as you see it in the above picture far better than the original placement of the carving in the inspiration fireplace.  It just "looks Steampunk", by which I mean it feels more like Art Noveau than the original.  :0)  My particular version of Steampunk is going to be highly influenced by the Art Noveau aesthetic... I think it lends itself well to the "unique" and "elegant" Steampunk vibe. 


Once I had the basic shapes of the front of the surround in place, I created three differing sizes of "mantel" out of mounting board.   Two are slightly smaller, and one larger. 

In the final version, I haven't yet decided whether the mounting board is sufficient for the application, or whether I want to cut these out of wood. It depends upon how things go with the later stages of this project. 


Here you see the way the three mantel pieces fit together to create a "molding".    You can also see that I departed from the inspiration fireplace by squaring off the overmantel, because I like the overall effect in my parlor room better.   

The tracing along the top represents some detail I am hoping to create along the top in the later stages of the fireplace surround build.  I'll post about that later. . .  for now, it is represented in mock up to help me visualize the final effects.  I process EVERYTHING visually, these little "crutches" are necessary for me to operate! 


Above is a shot of the fireplace surround in mock up form in it's entirety up to this point.  I will be adding a molding to the opening of the fireplace, as well as base molding.  


Now that the basic shape of the fireplace has been finalized, and representations of those shapes have been cut, I have turned to the decorative elements of the fireplace.   I found the above picture frame in a Goodwill store.  Not my idea of a beautiful frame, but it presented opportunities to me in regard to decor for my little fireplace. 


These little details will honor the look and feel of the original fireplace, while supporting beautifully the underwater vibe of the Grand Parlor.  I liked the seaweed pictured above as one element that I wanted to recreate on the fireplace. 


Time then to break out the trusty Amazing Mold Putty and the Amazing Resin to cast a version of the seaweed.   You see above that after casting, I have cut off the bottom of the new cast at the right point to allow it to fit into the final space allotted for it on the fireplace.  


I also liked the little fish elements spread all through the Goodwill frame, so also made a casting of two of those.   I don't want TOO much detail on the fireplace! 


Here are my little molds.  Rather frumpy, but hey, they work!


This finishes the basic mock up of the fireplace, other than the elements that make up the overmantel.  I'll be posting at least a couple of posts on finalizing that area.  Meanwhile, suffice it to say that there will be a "feature" just above the mantel, (again, if I can carry it off!!) and a mirror or framed picture (haven't decided for sure yet) above on the Overmantel. Take a look at the inspiration photo and see if you can guess what the "feature" will be.  If you do, you can see why I face that with some trepidation!  

I posted at this point, because I find the photo above intriguing. . . . I thought it would be a good "cliffhanger" for the next post.  : 0 )) 

Hope this finds all of you well and happy!  


Doug S

Sunday, October 12, 2014

The Green of My Sea


I have been continuing work on my Grand Parlor. . . and here it is as it stands today.  Wild colors and textures reign in this room!


The Grand Parlor Progress

Some may wonder at my choice of color combinations, and at the wildly elaborate elements I am using as part of my work on the Grand Parlor in this miniature house.   So I feel the need to "splain" myself! 


Sea Squirt Courtesy of Anthony Pearson - Flickr

I absolutely love the beauty and wonder of the seas.   The ocean is just alien enough that it brings us a new appreciation of the earth and all that is in it.   The green seas teem with an alien and unique life that implies a glorious, intelligent and creative being behind it all.  

We feel the wonder and power of the Creation, and it connects with our souls.   This elevation of the uniqueness and wonder of nature, as well as the wondrous works of man, are fully a part of the Steampunk movement. 


Chitty Chitty Bang Bang!  Courtesy of Wikipedia


Fascination with the unique has been  popularized by movies like Chitty, Chitty Bang Bang, The League of Extraordinary Gentleman, and Lemony Snicket.   Some of these films were made well before the full recognition of "Steampunk" as a movement, yet set the foundation for this incredibly creative genre. Steampunk is a compilation of ideas from many, many references to unique, over the top, fascinating elements of nature and of industry.


Steampunk Airship - Second Life photo Courtesy of Torley on Flickr


H.G. Wells 'The Time Machine',  Cassandra Clare's "Clockwork" Series for Young Adults, and Gail Carrigers' novel 'Souless' (all of which I love!) successfully plumb the depths of these unique and absolutely enjoyable styles, and bring in the elements of fantasy and science fiction which thread throughout the genre. 

Along with the well known elements of the Victorian age, Grunge elements, and the Automatons that have crept into the genre, there are significant references to the wonders of nature, the seas, the skies and the earth.  


20,000 Leagues Under the Sea Courtesy of Bryon Taylor


20,000 Leagues Under the Sea by Jules Verne is one of the most well known literary references, but the Legends of Atlantis and visual references to the Roman God Neptune all have become well known visual cues for the Steampunk Aesthetic. 


Hence, the strong references to the ocean you are beginning to see in the Grand Parlor!  See, somewhere in my head it all makes sense. . .  but it may never to some folks, especially those not steeped in the Steampunk genre.  But there  you have it!

My Grand Parlor is inspired by these references to the sea in the Steampunk genre, and so, I hope you see not wild colors, but the beginning of those nautical references influencing the choices in this room.
To begin the process of addressing the walls for the Grand Parlor, I covered all of the interior surfaces with mounting board.  This was to help strengthen the walls, and to crisp up the edges of the window and door openings.  I ran out of card before I was complete...so had to piece the back wall together.


So I Spackled the wall, and thought for sure I had taken care of the problem. 


Jorge, my little helper, and I then painted all the walls a light aqua green.  I was careful not to completely cover the mounting board, to let some of that show through, as I knew I wanted a bit of variation in the wall colors.


I wanted more variation, and also to get a closer match to the paper I plan to use for the flooring, so I then took a metallic green by DecoArt called 'Dark Patina', and added equal parts of Floating Medium, which enabled me to paint the new metallic color over the aqua without complete coverage. 


I used a Sea Sponge to spread the color, allowing the original aqua color to bleed through, and twisting the sea sponge enough to distribute the color somewhat evenly...though again, since I wanted a variable wall color, I darkened here and there to help create movement in the wall color. 


Everything went swimmingly (forgive the pun!), until I was all done.   I loved the variation in the wall color, and the sheen of the metallic paint.


But lo and behold!  I see seams!  Grrr. . . 


So back to the drawing board I went, attempting to cover the seams....


And overall, I did succeed...but of course "THE CAMERA" picks up the seams anyway....sigh.  But it looks much better, and I think with the other distractions such as curtain treatments and moldings, we should be able to create a new "Feature" using those seams.  :0)) 


I leave you with a glimpse of the construction in progress.  I love the way the colors set each other off, while maintaining a very different look in the two modules.  I am very excited to move this forward more, and see the completed rooms together.  

Hope you've enjoyed the next chapter in the saga of the Steampunk Chateau. . .   

Until next time!

Doug S