This post will continue what was started with the last post, a tutorial view of how to create a miniature faux stone trough sink. This has been a truly fun project, and I am pretty happy with its outcome!
 |
| The Completed Sink |
My point and click photos just do not do justice to the overall effect, but they will have to do, as I am not a photographer! This is a skill I probably need when blogging, and I learn a bit every time I undertake it, but we have a LONG ways to go!
 |
| After Spraying Stone Texture |
Those of you who are following progress closely will recall that the last post left the sink in the above condition. This photo was taken immediately after spraying on the stone texture to my carved shape.
 |
| The "Treated" Stone Sink |
I felt that the stone texture was a bit out of scale, so my next step was to work on adjusting that texture to scale. The outcome is photographed above. I think it is much more in scale, and has the variation and depth I wanted to have within the stone. I used the same process on other pieces of the final sink, so I will show you how this color and texture was accomplished when dealing with the sink sides later in the post.
 |
| Stone Sink Mock Up |
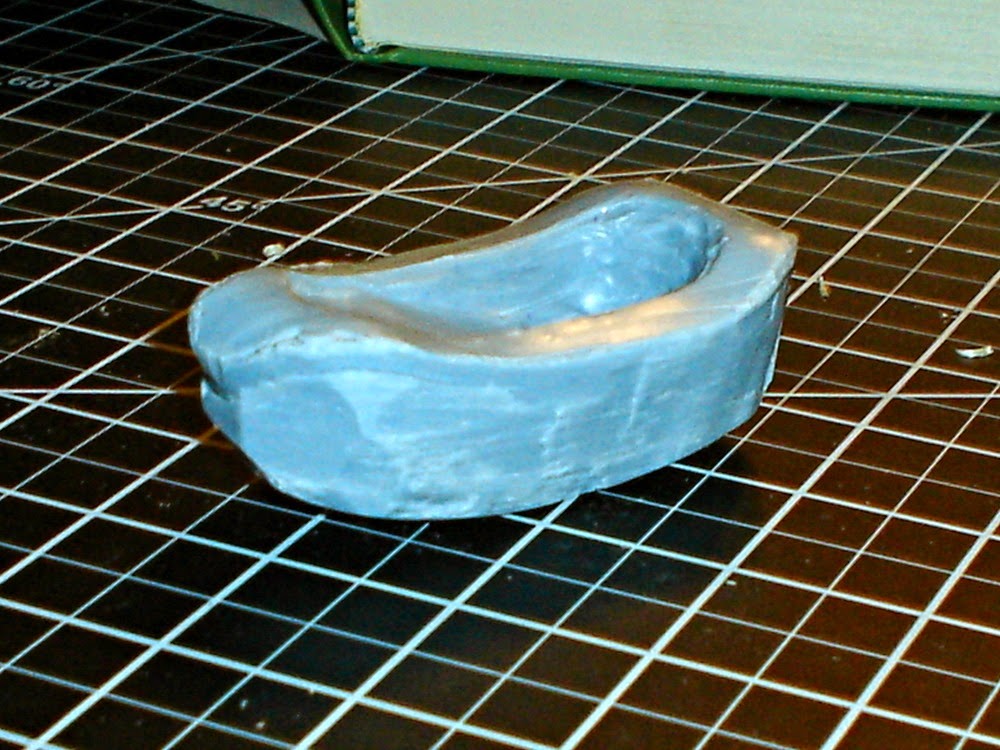
You can see above the mock up that I originally put together to help me shape this piece. Notice that I have a piece of Foam Core Board under the photographed mock up. This was one of the adjustments I made based upon the mock up. I felt that the sink was too short for scale, and the raised floor in front of it, which will be visible in the final scene, magnifies that effect. So I added about 1/2 inch to the height, to bring the height of the sink to just under 3 inches (~28 inches in real life measurements).
The other adjustment I made as I modified the plan based upon the mocked up sink was to adjust the shape of the legs. The major change was to make the foot shape more bulky in shape, and to add a stringer bar about half way down the legs. This really gave me the old, heavy, well used shape I was attempting to create.
Just an aside here, related to design. One of the key things that I think folks don't recognize when designing something for the first time is that the basis for establishing an effect begins with the overall shapes used. They must be in proportion, serve the effect that you want to create, and "speak" in and of themselves.
Any color and texture treatment to the piece later only enhances what you already started. In this case, the basic shapes already establish the rough-hewn effect, before any paint or texture has been added. This is accomplished by using mass, proportion, and scale (scale in the context of the entire room, not just the elements of the actual construction of the sink). These three, before ever a finger is lifted to add texture and color, establish the dynamic that helps shape the final effect created.
So as you create your own adaptation of this sink, keep an eye out for the "feel" of the shapes you are creating. This will go a long way toward establishing a successful final effect in your own version of the project.
 |
| Sizing the Hole for the Sink |
I used 1/4" wood for the project, as it established to my liking the bulk I wanted in the final piece. However, for a less rustic effect, a narrower piece of wood could be used. I started by drawing the shape of the completed stone sink on a piece of wood. I then drew inside that line, another line approximately 1/8 inch inside, all around the first line. This would be the cutting line, as the lip of the sink would rest upon the cabinet surface in the final piece, and I wanted the bowl of the sink to fit as closely as possible to the sink surface at the edges.
 |
| The Latest Addition to my 'Shop' |
I wanted the counter surface to appear to be made of massive pieces of weathered wood, so I chose to cut my surface piece into three pieces. This served the double purpose of allowing me access to the inside lines with the scroll saw, and of giving me 3 (4 actually!) pieces that I could shape into rough-hewn boards. However, an alternative that would allow an unbroken single surface would be to use a drill to drill through the board somewhere in the center (I would suggest somewhere along the inside line that you want to cut) and then use a hand held scroll saw to cut out the center shape.
 |
| Shaped Pieces of Sink Counter Surface |
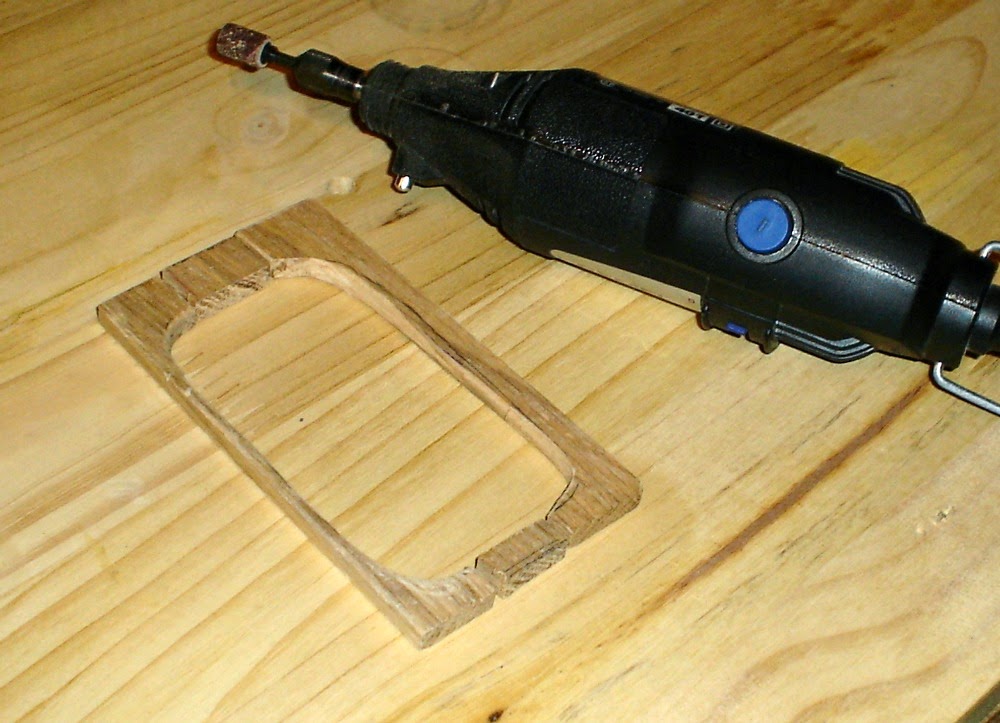
With my approach of creating separate boards as the sink surface and support, I ended up with 4 pieces that created the shape of my sink surround. Two along each side, and two at either end of the stone sink.
I used my Dremel tool, with a sanding cylinder attached, to rough up the edges of the boards. I just knocked edges off of the boards, and randomly distressed the boards to create the well used look.
 |
| Rough Cut of Sink Counter Legs |
I did the same to the leg pieces, cutting them somewhat rough in the first place (something that was aided by the fact that my board split on me!) and then roughed in and distressed the pieces to create a weathered "shape". This can be seen below in the next photo.
 |
| The Basic Pieces Required |
I cut the sink sides out of Foam Core, mostly because it was easy, and cold outside! :0) But honestly, in the end, I think I would cut these pieces out of wood next time as well. I ended up then with 9 pieces that I would assemble to create the sink base.
 |
| Adding the Base Coat of Paint |
Now that the pieces were all cut, I applied a base coat of a tan color to the pieces that would eventually appear to be wood. Your choice would be based upon the final color effects you wanted. I wanted a weathered wood effect, so began with a light color base. Should you want a darker wood effect, you could begin with a deeper color. The main thing to keep in mind as you decide this is that you will be setting the overall color 'tone' with this choice. All other layers of paint for this project were applied using a Floating Medium mixed with the acrylic paints, which allows color to be applied as a glaze, so this base color will affect the final outcome. It needs to set the basic color palette you want to create.
 |
| After Building up the Color for the Sink Base |
Over this base coat begin to apply multiple layers of color to achieve the effect you want to create. All layers of color applied should be mixed with Floating Medium at about a 50/50 ratio. This allows the color to be built and laid over earlier colors without entirely obscuring them. As you apply the Medium/Paint mixture, vary the amount of color you lay down, and deliberately leave some color from each previous layer showing through. All of these layers will appear to be "incomplete", but as you build color, the final effect will reach a place that it blends to create a "complete" picture.
I am not recording here the sequence I went through, as this was a very experimental process, and will likely be for you as well. I will tell you though that the colors I laid over the base coat were a combination of greys, white, black and browns. I used a total of ~7 layers. Except for the initial base coat, I did not allow each layer to dry in between. This allows each color to mix and blend with the colors laid down before, which helps increase the variation and natural effect of the final outcome.
Once the pieces were painted, I assembled the 5 pieces that made up the wood base of the sink. I used a square to true up the angle, ensuring that I got a 90% angle for the legs, and for the corners of the sink. This was a project I had to actually hold in place until the glue dried, approximately a thirty minute process! I do not have the proper clamps yet to clamp such a delicate project. If you are in the same boat, be sure you have the television or some other distraction set up before you start gluing!
 |
| Test Fit and Newly Sprayed Stone Sides |
After the glue for the basic assembly was dry, I applied the same stone spray finish I applied to the stone sink itself to the three pieces of Foam Core I had cut for the stone sides. Here is where I'll tell you how I adjusted the sprayed stone texture and color to bring it more into scale and add more depth and realism to the color.
 |
| Sanded Stone Sides |
For all of the stone pieces of this sink, I sanded the surfaces with a medium grit sand paper. This must be done gently, as if you are not gentle, you will sand the texture off entirely. You are just looking to knock off the bigger chunks of "stone" from the surface. Even with care, you may sand off just a bit of the surface, but as long as you leave the majority of the texture on the piece, you can work the "over sanded" portions into the final effect without issue. This happened on one end, as you can see above.
 |
| The First Color Layer - Gold |
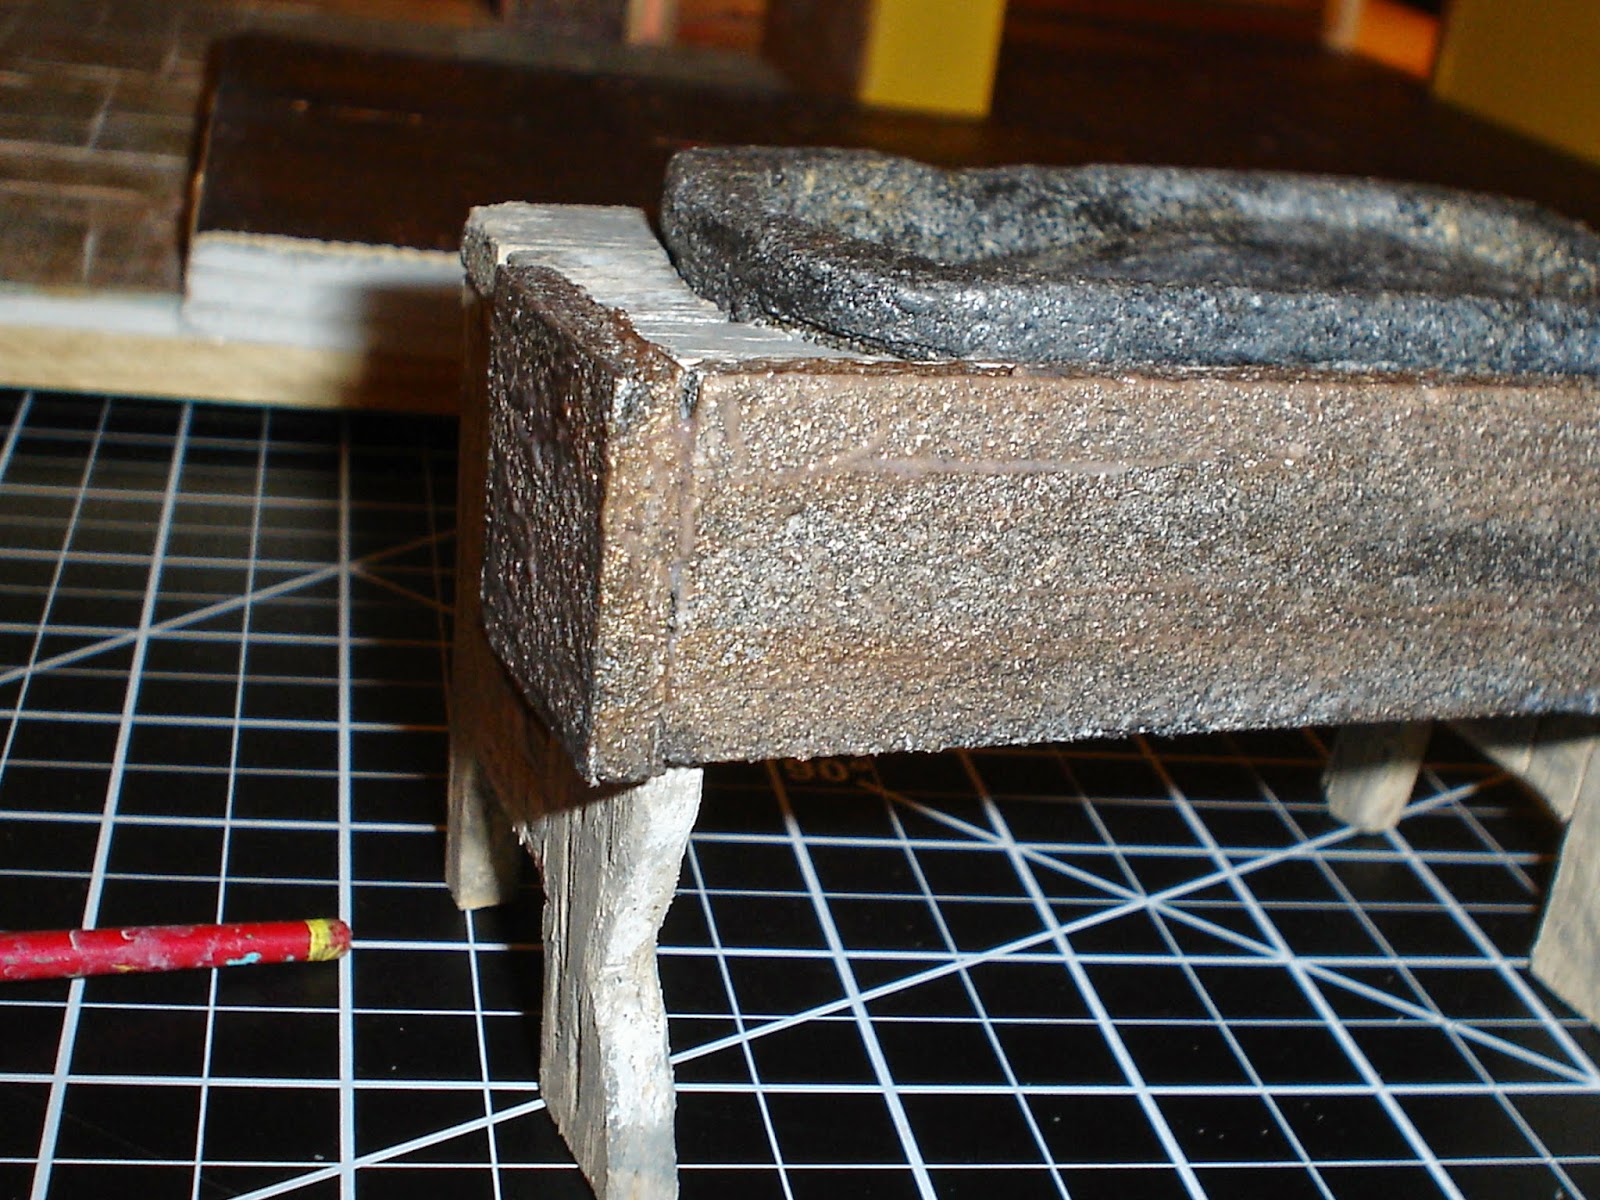
I then took the DecoArt "Rich Espresso" Metallic acrylic paint we have seen before, added an equal amount of Floating Medium, and ghosted the gold across all of the stone surfaces. In nature, stone usually has some metals in it, and this can help add to the realism. In the end, you do not "see" the color, but it is there, and registers as part of the depth of color you will finally achieve.
 |
| Second Layer Matte Varnish |
I chose to add a layer of matte varnish over the gold, as I didn't want the shiny effect to come through, and it also helped to "fill in" the gaps that made the "stone texture" feel out of scale to me. It gives a smoother quality to the stone that registers as more realistic.
 |
| Third Layer - Black |
I applied a third layer of paint that was about 50/50 black paint and Floating medium. Note that the application does not cover everything below it. It was applied in uneven streaks and blotches to help create variation across the face of the stone.
 |
| Fourth Layer - White |
The last layer of paint applied was a 50/50 mixture of White and Floating Medium. Again, the paint was applied somewhat randomly, and while the layer below was still wet. The paint mixes with the layer below it in each case, and helps create the variation of color that is in all natural stone.
I'd also like to point out one other thing about using Floating Mediums. Note that in the below picture, the sink appears much more grey than the photo above. I did not add additional color. Adding Floating Medium to acrylic colors causes them to be more translucent, and as they dry, they "flatten", for lack of a better word, and the dried color is often lighter or darker than the wet color. This is something you should plan for. If you want a "precise" color, find another technique! I like the variation that is created through this process, and am more worried about final effect than precise colors, so this works for me in this application.
 |
| The Completed Sink in Place |
Here is a closeup of the final sink in place. In real life, the color variation is present, but it is not as obvious. That is my lack of photography skills! The final effect is very much like worn stone.
 |
| Even the Kitchen Sink! |
Here is a shot of the final outcome in context. It creates a wonderful aged effect that I like. I may go in one more time to create a bit more natural variation on the stone sides, but this is very close to what I wanted. If I do add a bit more color, I'll post the latest update after. :0)
I'll also share that making this sink, from the first cut to last (so far) paint stroke took approximately 20 hours, including carving and dry time. I love the outcome, but this project does take some time to do. So before you start a project like this, be sure you don't mind spending the time it will take!
I hope you have enjoyed seeing the process I went through to create this miniature trough sink. For me, it has been well worth the effort. I hope the process triggers ideas for you about how to create your own projects!
Now on to the next project. I always go through the same process after completion of a project. It is kind of funny. My first action is always to clean up the work area. Every project I do leaves a hurricane like pile of debris behind, and I can't even THINK about the next project until I get that cleaned up. Then I usually go into thought mode...what is the next project to tackle? Then, how do I create it, and what do I need? Then I ALWAYS procrastinate. Something I hope some day to leave behind! So off I go to clean up my work area! I'll tell you what I am going to work on next once I figure it out!
Until next time!
Doug S